Showing posts with label Instructional Design. Show all posts

Tuesday, November 22, 2016

FTT - Triventy

From the Triventy Website
Sharing the Load: Collaborative Online Quiz Creation with Triventy

@joe_edtech/@LisaBerghoff

It is the day before Thanksgiving Break and I think one of my friend's Facebook Posts from last night summed up everyone's feelings perfectly, "I have decided that I no longer want to be an adult. If anyone is looking for me, I will be in my blanket fort, coloring."

It has been an eventful and crazy Fall. After suffering through 108 years of abject failure, the Cubs won the World Series and an entire region of the country came together to celebrate a victory which transcended baseball. As a country, we are dealing with an election cycle that more closely resembled a badly staged reality TV show than anything I've ever seen before. Even still, with seismic social events going on, our lives, and our students' lives, go on. Kids are dealing with classes, activities, medical issues, family issues, stress about the future, and the pitfalls of navigating everyday spaces in high school. This Fall, more than almost any other, I'm conscious of the fact that our kids need us to talk to them - they need to know that there are adults who care about them and will be there for them. It is a reminder that the most important thing that we do is teach kids, not content.

But having said that, class goes on. And we are faced with meeting the challenges of providing our students with the skills and knowledge necessary to be successful at the next level. Especially when demands are high, and timelines are tight, I think we have to find ways to share the load and work together. If we've lost some class time this Fall because of, well, the world interfering with our plans, we at least have great colleagues on whom we can rely and with whom we can collaborate. 

Generally speaking, the Free Tech Tools that we choose to share are selected to provide you with a different way of engaging students. Today's tool was selected as a different way of engaging your colleagues and capitalizing on our shared ideas and efforts.

Most of us are familiar with online quiz/gaming tools like Socrative, Kahoot, and Quizlet (see our previous blogs for detailed information about all three). Triventy.com is not a paradigm shifting online quiz platform. It is an online quiz platform that makes it easy for several teachers to work together to create a quiz. Need to pare down a lesson to its most important skills to save time? Or do you want to spend a little time during your late start working together focusing on the essential questions from a unit of study? Triventy.com is a tool that can facilitate some of that work.

Start by going to Triventy.com and sign up for a free account. Since Triventy integrates nicely with Google Classroom, make sure that you use your district email account when you sign up. Also, in order to use the full product for free, you'll need to select the Free Edu version and identify District 113 when you sign up.

Once you've signed up and you begin writing your first quiz, the platform will look a lot like other quiz creation tools. You can add images to identify topics. You compose questions and answer choices. Decide if you want the questions to be worth points and have a right answer, or serve as a poll/discussion starter. There is even a place to provide hints and feedback.


What makes Triventy different, though, is the ability to invite others to add questions to the quiz.


Once you click the button to invite question contributors, you get a link that you can share with your colleagues in a variety of different ways (email seems to be the most efficient). Your colleagues click the link and add questions. As the owner of the quiz, you can always decide to edit or remove any questions that have been added to your quiz. Also, if you have a group of people adding questions, their will be an author's name attached to each question. No question is submitted anonymously.


Finally, since you can integrate the tool into Google Classroom, you can actually invite your students to create quiz questions. Never underestimate the power of asking your students to find the right questions to ask! The same rules apply to students. They cannot submit questions anonymously, and all questions they submit will have to be approved by the quiz owner.

Here is a short video introduction to Triventy.com from Richard Byrne, author of the Blog Free Technology for Teachers. (I highly recommend his blog - if you are ever stuck for an idea, that is a great place to start.)


-------------------------------------------------------------------------------------------------------------
Got any other tools that help you share the workload with your colleagues? Tell us about them below!



Tuesday, October 25, 2016

FTT - Google Read & Write

Improve Reading and Writing Confidence With Read&Write


@LisaBerghoff/@Joe_EdTech


Remember the first time you saw Google docs? The whole idea of students being able to share documents, work collaboratively, embed links, images, etc. regardless of the device and regardless of physical location still completely blows my mind. The list of things we are now able to do to help our kids learn keeps growing but one thing remains, reading and writing is key for student success in any  subject area.Yes, even math. The big question is, what do we do when we have students who are struggling with reading and writing? There is a company called TextHelp whose mission is to bring literacy to life for everyone. They have several amazing products but today I want to highlight my favorite. 

Read&Write for Google is an extension that is free. Many of our students are already using it but may not know the full extent of what it can do. For those of you who are new to Read&Write, it allows students to hear words, passages, or whole documents read aloud with highlighting that makes it easy follow. It has both a text and picture dictionary. Students can hear words translated into many languages. The read aloud and translating features are free for everyone. TextHelp gives teachers their premium version for FREE and it's yours forever (their words not mine). To sign up and get your free premium version, click here after installing the extension. Students can sign up for a fee 30 day trial of the premium version. The upgraded version, which is completely free for teachers, also has word prediction, speech to text, voice notes, highlighted text can be automatically converted into a new document. The list goes on because TextHelp is constantly adding features. 
Read&Write works on Google docs and on any web based text. For example if you have students reading an article on National Geographic's website, they can use the read aloud features for that article, hopefully with headphones. The premium version also includes pdf, epub, and kes files. 

Adding and using Read&Write is extremely easy. Just go to the chrome web store from your apps doc or click here. Once you click to add Read&Write, you need to give it permission to access your google account. Once it is successfully installed, you will notice a little purple puzzle piece that will show up near the top of your screen. Clicking on that puzzle piece activates the Read&Write features. As you hover over the icons, you will see text pop up that explains what everything does, though I bet you can guess which button stands for "play" and which one stands for "stop".

Helping your students add Read&Write is going to be a breeze because it's the same process. The kids can control the speed and the voice that is used for the read aloud by clicking on the gear icon in Read&Write. Since it is an extension, it will work on whatever device the student is using, as long as they are logged into chrome.

Giving your students access to Read&Write helps them to utilize the supports that they need independently. I'm not sure how it looks in your classes but in my biology class, having a teacher sit next to you and read to you can really negatively affect your self esteem as a student. When my students are able to use supports in a way that does not draw attention, they are more likely to use the supports. Also, having those supports available gives them more confidence in their reading and writing and therefore makes them more likely to participate actively in class. 

Here is a short video introduction to Read&Write:


Are you or your students using Read&Write? If so, post in the comments section below and let us know how it's going. 

Tuesday, September 27, 2016

FTT - ePals for Global Connections

From the ePals Website
Making Global Connections in Your Classroom

@joe_edtech/@LisaBerghoff

One of the many things that has impressed me in my short time in District 113 is how globally aware our staff and students are. As proud as we are to be Giants and Warriors, I don't get an insular feeling of isolation at all. All eyes are focused on the future of our global community.

With technology in the hands of all of our staff and students, our global connections can become more than just theoretical. However, based on several conversations I've had this year, there is a little bit of trepidation about connecting our kids with that global community online. At a National School Board Conference a short time ago I was introduced to the online tool called ePals, designed to give students authentic cross-cultural experiences in a completely safe, managed environment.

From the ePals website, "Teachers use the free ePals Global Classroom to create real world, culturally- enriching learning experiences for their students. With ePals classroom matching, a high school class studying Chinese can connect with a class studying English in China, or the classes can work on a special project together." While ePals is great for World Language, it is also perfect for any globally minded classroom.

Here's a short video that shows you what ePals can do and how to get started:


For the High School Classroom:
There are a lot of tools included in the ePals suite, and you may want to use some of them with your classes. I've found that the tools we have in Google Apps are probably better for collaboration and production with high school students, but ePals overall has been designed to be a safe place for students as young as the elementary age to develop authentic global connections. The "Classroom Match" tool is what really makes ePals powerful for high school students.
--------------------------------------------------------------------------------------------
Have you used ePals or a similar tool to make global connections in your classroom? If so, please share your experiences below.

Tuesday, September 13, 2016

FTT - EDpuzzle and PlayPosit

http://nyphotographic.com/

Alternatives to Zaption: EDpuzzle and PlayPosit

@joe_edtech/@LisaBerghoff

For good and for ill, technology is always changing. The company that created and supported Zaption, one of our favorite "Free Tech Tools," was sold and the new company announced that the product would be taken offline.

The good news is that while we tend to highlight our favorite online tools, there are usually pretty decent alternatives in the EdTech world. EDpuzzle and PlayPosit (formerly eduCanon) are both great alternatives for teaching with online video. Like Zaption, both allow you to take ANY online video, embed questions, and assign it to students or groups of students. 

EDpuzzle 

Edpuzzle.com is a free Web2.0 tool that is designed to help teachers make any digital video interactive. With a few clicks of a button, teachers can add personalized introductions, comments, or questions to any portion of any digital video available through the products listed to the left. Furthermore, the videos can be assigned to groups or classes, and teachers can monitor student progress as they view the videos and answer questions, and the videos can be locked so students can't skip important parts just to answer the questions.

Videos and lessons created on Edpuzzle.com are public and searchable within the platform. The idea is that we are all creating products that could potentially help other students. So part of the power is that you can simply log into to Edpuzzle.com and find a video lesson that has already been created and assign that to your students. You don't always have to start from scratch. 

To get started, simply select your video source and use the embedded video editing guides to add voice-overs, comments, or questions. As an added bonus, EDpuzzle.com integrates nicely with Google Classroom, allowing you to easily import your roster and share "puzzles."


PlayPosit - formerly eduCanon

PlayPosit works pretty much the same way EDpuzzle.com does except that it has been designed to integrate nicely with any LMS, whether you use Google Classroom, Edmodo, or Schoology. Rather than "puzzles," you create and assign "bulbs" to your students.

The best way to see the way PlayPosit works is to try it out. Click here to open a public "bulb" created for a Ted Talk video. Notice, you'll have to answer the embedded questions before you can move on in the video.


Here's how my friend Mike uses PlayPosit in his classroom:

I use PlayPosit for a couple of purposes. One of them is to disseminate information via the flipped classroom model. Students can access the lesson that I've created in PlayPosit and watch the video presentation for class discussion the following day. The best part of PlayPosit is that during the presentation, kids have to answer a few questions during the video. This serves the purpose of not only checking for accuracy in their viewing, but also as a focus point. It also allows me as a teacher to design questions that are timed to emphasize the points that I wish for them to know. Finally, the questions are required. The video will not go on until the question is answered. It is a creative and interesting way to get started with the flipped classroom model.

----------------------------------------------------------------


Have you used EDpuzzle or PlayPosit in your classroom? Tell us how. OR tell us if you use a different tool for embedding interactive videos in your classroom.

Tuesday, August 30, 2016

FTT - Google Form Quizzes

Creating Quizzes Using Google Forms

by
@joe_edtech/@LisaBerghoff

Google forms has always been a great tool for formative assessment. In the past, though, we've had to use an add-on called Flubaroo for grading. However, over the summer, Google released a major update to Forms allowing you to turn any form into a self-grading quiz with the flip of a switch. Follow the directions below to get started.


Start by creating your quiz as you always would. By the way, even though you automatically collect your students' email addresses in the process, I think it is a good idea to create questions for their first and last names. I'd also create a question for the period of your class. These quick steps will make it easy for you to view and sort the responses in spreadsheets if you choose to do so.

I recommend using short text items for students to enter their
names and the class period.
You can then start asking questions. Google Forms will automatically multiple-choice, checkbox, dropdown, linear scale, and multiple-choice grid items. Type in the questions and answer choices like you always have. Then click the "gear," or settings icon, in the upper right-hand corner of the form screen. You'll get a pop-up window with three tabs.

On the "General" tab, you can restrict the quiz to district users, automatically collect their email addresses (which is very important if you want to automatically send their scores to them), and limit each user to only 1 response.
There's one other big change on this page. If you uncheck the box next to "Response receipts," your students will not have the option of having a copy of the quiz and their answers emailed to them.

On the "Quizzes" tab, you'll need to first click the slider next to "Make this a quiz." Then you can make some decisions on when students get results, and how much information they receive. (Each option has a little question mark after it. Simply hover over the question mark to learn more about the option.)

Once you click save you'll need to set up your answer key.

Underneath each quiz item, you'll see a link titled "ANSWER KEY."
Click that link and you'll have a slightly different view of your quiz items. Now you can select the right answer and decide how many points each item is worth.


When you are finished making the quiz, click the "SEND" button to share the form with your students. 
You can email the form directly to your students or you can copy the link and post it to your Google Classroom, website, or Google Plus Community.

After your students take the quiz, you can view the results in a spreadsheet, or you can view responses in the form itself. 

Here is a pretty detailed video on getting started with Google Quizzes from fellow Google Trainer Mark Repp:


________________________________________________

This is meant to get you started with the Google Form Quiz feature. Lisa and I will share some advanced user tips in future blog posts. 


Tuesday, May 17, 2016

FTT - WeVideo

Video Projects Stressing You Out? Check out WeVideo and "Easily Create Outstanding Videos"


@LisaBerghoff/@Joe_EdTech


I have met with so many teachers in the last few weeks who are excited about their students' final projects, except for one small detail. It seems that the students do a fantastic job of collaborating, problem-solving, researching, and compiling information to share. The issue comes to surface when the students actually present to their classmates. They take weeks of excitement and hard work and put it all into a dry, boring slides presentation. Sure the students choose a catchy theme and add some images to their slides. But when they actually present they end up reading off of their presentation and all of that passion and excitement goes right out the window. I have experienced this in my own class this year. My students take an engaging, thrilling topic and somehow manage to deliver a rather dull presentation.

One solution to this problem is to have students create a video. They will have an opportunity to be creative and original. Also, you really can't  fake a video. Video creation and editing takes focus and careful attention. You have a much better chance of getting a higher quality final product if your students create a video. Especially for those students who really struggle with  speaking in front of the class.

There are several video creation and video editing tools out there but my current favorite is WeVideo

Here is an overview of WeVideo in less than one minute:


Here are the top 10 reasons why I like WeVideo so much:

1. Sign up and sign on with your school Google account.

2. It is web-based so it works very well with Chromebooks.

3. You can upload your content from multiple locations, such as GoogleDrive, OneDrive, Facebook, Instagram, DropBox, and more. 

4. The drag and drop timeline is very straightforward and easy to use.

5. Even though it's easy, there are also some more advanced features so you can make a high-quality video. Use the storyboard mode if you are new, try out the timeline mode to layer tracks, images, and text. 

6. You can add a voiceover to your video. This is helpful when your students have a story to tell but probably won't get it right in one take.

7. Your students can use their Chromebook's webcam to record their own content. 

8. There are free themes, graphics, music tracks, and sound effects, most of which are way better than what we can create on our own.

9. When you publish your finished video, you have multiple options, send it to your GoogleDrive, Youtube, DropBox, etc.

10.  The WeVideo Academy has video tutorials that are less than 2 minutes long and so simple to follow your students will not rely on you to teach them how to use it!


Instead of sitting through 25 slides presentations, why not pop some popcorn and have a film festival for your final project sharing day? You can have your students upload their videos to their GoogleDrive and then put it in your shared folder for easy access.

------------------------------------------------------------------------------------------------------------

Have you assigned video projects?  Tell more in the comments section below. 

Tuesday, April 19, 2016

FTT - OpenBadge.me

Changing the Educational Game
with Digital Badging

@joe_edtech/@LisaBerghoff


A couple of years ago, I attended a conference that hosted a TEDx event instead of a Keynote address. Perhaps the most outstanding speaker I saw that night was Ali Carr-Chellman from Penn State University who talked about her program, "Re-Engaging Boys." If you have a few minutes, you can watch her TED Talk below:


If you don't have time to watch the whole thing, here's a brief summary of a couple of the statistics she cites:

  • For every 100 girls suspended from school, there are 250 boys suspended from school.
  • For every 100 girls expelled from school, there are 335 boys expelled from school.
  • For every 100 girls in special education, there are 217 boys.
  • For every 100 girls diagnosed with emotional disturbance, there are 324 boys.
  • The numbers are worse for boys of color, or boys who come from economically challenged homes.
  • Boys are 4 times as likely as girls to be identified with ADHD.
  • 60% of Baccalaureate Degrees go to women - some universities are approaching 70%
One of Professor Carr-Chellman's suggestions is that we can re-engage boys by utilizing video games in the classroom. While her research might be the most extensive on the topic, Professor Carr-Chellman's conclusions are not unique. There is a growing chorus of teachers out there who suggest that adding some elements of gamification can boost student engagement across the board, but especially in boys. 

I started thinking about this topic again because Lisa and I attended the CoSN conference two weeks ago, and the most dynamic session I attended while I was there was about gamification in the classroom by Dr. Liz Kolb from the University of Michigan. Dr. Kolb said her research was really in its beginning phases, but she had seen some positive results by adding elements of gaming to her preservice education courses, and she reported that those gains were highest amongst her male students.

Dr. Kolb suggested that it is fairly easy to start the process of gamification by instituting some student choice into your classroom activities and awarding students digital badges based on accomplishments. I think I'll have much more to offer the district from Dr. Kolb's work in the very near future, but for those of you who might be ready to start badging in the classroom, you need two things. You need a site for creating badges, and you need a site for posting and awarding your badges. For this week, let's focus on creating digital badges.

Part of the Mozilla Open Badges Project, OpenBadges.me allows you to create simple graphic badges that you can download to your computer and post to any website. According to the website, the OpenBadges.me "designer provides a simple way to layer different shapes and images on top of each other to create an attractive Open Badge graphic. The tool lets you add text, color elements, move certain elements and even fade items in and out - all presented in an easy-to-use web page."


Click here for an easy to follow guide on using OpenBadges.me. If you get stuck, you can even go to the guide and post a question. Someone from the Open Badges community will respond to your question.
----------------------------------------------------------------------------------------------------------------------

Next week, I'll provide you with three different platforms for posting and awarding badges to your students.

Tuesday, April 5, 2016

FTT - Twitter for Professional Development

"Follow me! Follow me to Freedom!"

@joe_edtech/@LisaBerghoff

Well, that might be a little dramatic, but I always get excited when we can connect in very cool new ways. And this is cool, I am writing to you from my "spacious" coach seat on board my American Airlines flight to Washington DC. Lisa and I are attending and presenting at the CoSN National Conference on Ed Tech Conference this week. Of course, we'll share our presentation and all of the new resources we get when we get back. But, we really don't want to wait that long to tell you about the great things happening here. 

Even if you never send a Tweet, Twitter can be an amazing Professional Development tool for educators. This week, Lisa and I will be Tweeting out lots of information from the Conference, some of it you'll be able to use in your classes right away. Some of it will just be fun. For instance, we got to hear Daniel Pink, author of Drive: The Surprising Truth About What Motivates Us, give the Keynote address. He opened the tech conference by talking about how important devloping art skills is. And he challenged everyone in the audience. "You can't change everything in your school district at once, but you can one small thing you can change tomorrow and make things better."

We also got to meet Megan Smith, United States Chief Technology Officer, Assistant to the President focusing on how technology, policy, data and innovation can improve the future of our nation. She talked about the importance of offering creativity tools, maker spaces, and authentic coding experiences to reach even our most disenfranchised students.

Lisa and Joe Hobnobbing with Megan Smith

To follow the rest of the conversation and conference activities, all you have to do is get a FREE Twitter account and search for the hashtag #CoSN16. If you are new to Twitter, here's a short video from Dan Krutka, Ph.D..to help you get started:

Once you get logged in, try following some of these great educational resources:

  • Edutopia - The George Lucas Foundation for Education
  • NSBA - The National School Board Association
  • David Pogue - Tech columnist, NY Times; PBS NOVA host; Missing Manuals creator, dad of 3!
  • Common Sense Media - Organization for Research Based Digital Citizenship Curriculum
  • Deerfield High School
  • Deerfield High School Libraries
And that doesn't even scratch the surface. You can follow writers, other teachers, colleges, organizations, teams, politicians (ugh, I don't recommend following them).

Here are some great lists and resources you can use.

All you need to do to get started is create an account on Twitter.com. HOWEVER, before you do, click here and check out "The Ultimate Twitter Guide for Teachers." Jeff Dunn (@edudemic) provides you with:
And much, much more.

Once you start using Twitter, you'll learn about "hashtags" (#). They are used in Tweets to denote important topics, and to make Twitter feeds more searchable and user friendly. The most important hashtag for educators is #edchat. Click here to get an idea of the myriad of topics discussed on Twitter labeled #edchat.

Find Twitter Here - And create your free account today.

By the way, there are two great HashTags (#) you should be following and contributing to if you are on Twitter:

#DHS__Pride = Tag the great staff, students, and accomplishments we have.
#D113PLN = Contribute to our online Professional Learning Network


MOST IMPORTANTLY, this week, follow #CoSN16.  Our session, "What NOT To Do With Technology In The Classroom" will be Tuesday, April 5, from 1:45 to 2:45 Central Time.

Tuesday, March 1, 2016

FTT - Choosito!

Using Choosito! to Differentiate by Reading Level

@joe_edtech / @LisaBerghoff

Technology changes. Sometimes, I don't like the changes. But it happens and I learn to get over it. For instance, I have spent a lot of my time teaching people how to search well using Google's Advanced Search features - and one of the things I loved to teach about was sorting results by reading level. OK, Google didn't give you Lexile levels or anything like that, but the search engine used to categorize the results by Basic, Intermediate, or Advanced reading levels. Alas, Google giveth, and Google taketh away - reading levels are no longer available in Google's Advanced Search. 

However, Choosito! is a free Web2.0 tool that will allow you to search the web, and their curated library, and filter by both content and reading level. Here's a short video to help explain Choosito! a little better:


Once you create a free account and log in, you can go to Choosito! Search. Simply enter the topic as you would on Google, then choose your categories. What reading level do you want? Are you looking for that topic in Humanities or Business & Career? And are you searching the web, the Choosito! Library, or are you searching for a school safe image?
When you get your results, you get a little more than a link to a website. You get a preview of the page, the website "ranking" from other Choosito! users, and the ability to add the resource to your own curated page (click the "+"). Some of your resources may have an icon that looks like a little red schoolhouse. That means the resource has been vetted by a number of other teachers and librarians and added to the Choosito! library.
____________________________________________________________________________

If you've found other ways to get differentiated Internet search results, please tell us about them below.


Tuesday, January 19, 2016

FTT - Updates to Google Classroom

Keeping Up With The Google
A Summary of Recent Updates to Google Classroom

@joe_edtech / @LisaBerghoff

Last week at both DHS and HPHS, we had a chance to show several people some of the recent updates to Google Apps. However, we know that this is a busy time of year for a lot of you (in fact, we haven't really found a time of year when teachers and technologists aren't busy!) So, over the next two weeks, rather than introducing new Web 2.0 tools to you, we are going to summarize some of the major updates we've seen in Google Apps for Education this Fall. This week's blog will focus on Google Classroom and next week's post will look more closely at Drive, Docs, and Sheets.

Google Classroom

I've been saying it for some time now, but this tool is getting better and better every day. It isn't a full learning management system, but Google Classroom has become a great way to organize your class, share content with and from your students, and host classroom conversations! 

Share to Classroom:
Closing the gap quickly on Hapara as a classroom management tool, Google released a new extension called "Share to Classroom." It allows a teacher to take resource they found on the web and immediately share it with their students in Classroom. If the students are logged into Google Classroom, the resource will open in a new tab on their device, whether they are using one of the school's Chromebooks or not. Simply go to the Chrome Webstore and add the extension to your browser.
From Google For Education Blog

Integrate Zaption or EDpuzzle Assignments directly to Google Classroom:
A lot of teachers have been using tools like Zaption or EDpuzzle to flip lessons or provide extra opportunities for students to interact with and master content and skills. However, those tools have always existed "outside" of Google Apps. No longer, on many Web 2.0 tools, when you have a completed project to "share," you'll see a "Share to Google Classroom" icon. If you click the button, you can add your Zaption or EDpuzzle creation directly to your Google Classroom. Here's Zaption's quick video on Sharing to Classroom:


Sort Students for Grading:
When it is time to grade an assignment, you can now sort assignments based on whether or not they have been completed, or based on student first or last name. One cautionary tale is, and we learned this from Hapara sometime last year, some of our students names appear to be reversed (I think that has to do with the way we set up accounts in Google Apps, but I'm not sure. This is also a very sporadic problem.)

Google Calendar Integration:
The biggest complaint I had with Google Classroom when it was first introduced was that it didn't automatically add things to a Google Calendar for students. FINALLY, that problem has been solved. There is a calendar for every class you create in Calendar, and assignments automatically get added to the calendar and shared with all of the students. Here's a short video explanation from Google Certified Trainer Jenn Scheffer:


Post Short Answer Questions:
Earlier in the year, it became possible to add Google Form Quizzes to your Classroom Stream. But, what if you just want to ask one question to check for understanding or spur a deeper conversation? Now you can ask short answer questions in Classroom the same way you post assignments or announcements. On the lower right-hand side of your Classroom Stream, you'll see a "+" sign. Click that and select "Create question." You can ask your question live in class, or you can give it a due date and give the students time to think. As with assignments, it is easy to see who has completed the question and who has not. And you can decide whether or not you will allow students to see and respond to other answers posted in the class.

---------------------------------------------------------------------------------------------------
Have you tried Google Classroom yet? If not, why not?


Tuesday, January 5, 2016

FTT - Text 2 Mind Map

Text 2 Mind Map Home Screen
Support Both Linear & Non-Linear Thinkers With Text 2 Mind Map

@joe_edtech/@LisaBerghoff

You don't have to spend very much time trying to solve a problem or work through a set of directions with a group of people before you figure out that people think about things differently. I have two friends who love to put things together and are considerably better at that than I am. However, they go about it in very different ways. One is meticulous about reading every word of the directions provided or manuals included before he ever attempts construction. Then he will lay out all of the materials and tools and follow the directions line by line until he is finished. Friend number two is a tinkerer. He believes that directions and manuals represent the least possible creative way to complete the job. Since I've seen them both build some amazing and beautiful things, it is impossible for me to say which one of them is doing it "the right way."

The same kind of thing applies to the classroom. I've worked with teachers who insisted that their students take notes a certain way, sometimes using a certain color of pen, highlighting, and underlining, and numbering the items exactly as the teacher would have done it if the teacher were taking the notes. I even understand this method of teaching - some students really need some directions on taking notes. However, in my first year of teaching AP European history, I met a student that simply didn't think in a fashion that fits with structured note taking. Often times, when he was trying to understand relationships, he would draw pictures. Since he was easily the best, and most engaged student in the class, it would have been silly for me to require him to take notes in a manner that is awkward and foreign to him. That is why I believe it is important for us to offer students choices, and help them learn how they best learn.

In a previous blog post, I wrote about the importance of making Mind Mapping available to kids who don't necessarily think in a linear fashion. But what do you do if you have to accomodate both linear and non-linear thinkers in one group? Text 2 Mind Map is a pretty simple Web 2.0 solution that allows kids to create Mind Maps from outlines. They maps can be downloaded or shared via email. Here is a brief overview of using Text 2 Mind Map:


The downside to Text 2 Mind Map at the moment is that it isn't truly a collaborative Web 2.0 tool. In other words, your students can't create accounts (that is a premium feature) and share editing privileges with another student or with you. This is strictly for creating a mind map from an outline.

-----------------------------------------------------

What tools do you use to help kids think about their own thinking?


Tuesday, December 15, 2015

FTT - Quizziz


Quizizz: Fun, Engaging, Multiplayer Classroom Quiz Games and Yes, Students Can Play From Anywhere!

@LisaBerghoff / @joe_edtech


I'll admit that I can be a sucker for bells and whistles.  I love toys and games and fun in the classroom if they are used in a purposeful way.  When students come back and visit years after graduation, it's the funny, silly activities that they remember and connect with most.  Do any students come back and say "Remember that time when we sat in rows quietly and took notes?" I recently led a workshop and asked teachers from various schools to describe what their classroom looks like when their students are truly engaged.  Words like "active", "participation", "loud", and "excited" came up as the teachers thought about a time in their classroom when students were engaged.

Of course, the topic of Kahoot often comes up during these types of discussions.  Remember the first time you did a Kahoot?  You will absolutely not get that kind of response when you assign a worksheet.  That's because tools like Kahoot are engaging and fun by design.  They allow students to participate in a way that does not require them to push too far out of their comfort zone, but still makes you feel like you are playing a game and taking a risk.  One of the most common questions that comes up with Kahoot is whether or not students can participate in these fun quiz games on their own or from home.

That is why I am thrilled to share Quizizz with you. 

http://www.slideshare.net/Quizizz/quizizz-presentation-49737217

Quizizz is  a free, online tool that allows you to create classroom game show-like quizzes.  Similar to  Kahoot, the students have questions and  up to 4 options for responses.  You can create your own or use one that has already been created.  You can even create your own quiz but then steal collaboratively take advantage of individual questions that other teachers have made and put them into your own quiz.

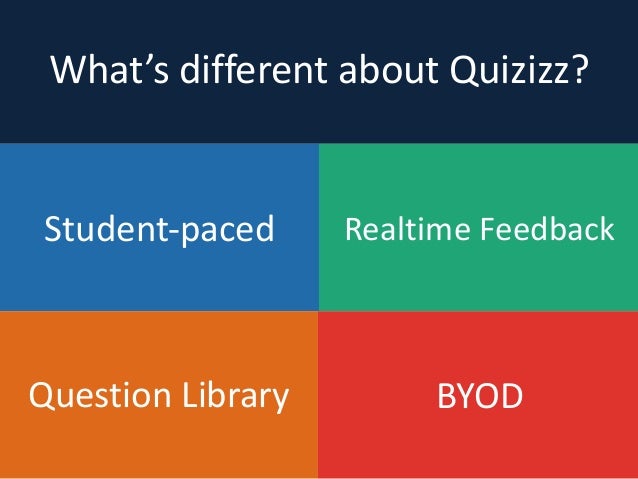
There are several key features that make Quizizz different from Kahoot.  First, you can adjust the timer from 5 seconds to 15 minutes of time allowed to answer a question, or you can adjust the settings so the question timer is off completely. You can play the games live during class but allow students to play at their own pace because the entire question shows up on the students' screens.  The way Quizizz works is such that you can play at your own pace but still feel like you're playing against your classmates.  Quizizz also has a feature that allows you to assign the quiz for homework. There is a  calendar feature to set the days that the quiz is open and give your students the Quizizz code to join your quiz. It also has a meme generator that will give the students instant feedback by way of funny kittens and silly graphics. Another feature of Quizizz is that when students finish playing, they get valuable data showing how they did on each question. 

When your students first log in at join.quizizz.com, they will enter the game code and their name.  In order to effectively grade the quiz, I suggest mandating a naming convention so that students must enter their first name and last initial or some other standard format so you will know who is participating.  The students are then assigned an avatar (mine was an adorable sheep with glasses) and then are prompted to proceed.  As students are answering the questions, they are given immediate feedback on how they did on each question.  Once they are done, they can see how they did on all of the questions and they can go back and review the questions.

https://twitter.com/quizizz/status/562659247066861568


As the teacher, you can pull up a "report" that shows the percentage of students who answered each question correctly.  You can also click on individual students to see how they did.  The reports page gives a very easy to read graphic so you can quickly see which of your students need more instruction. This type of formative assessment is quick and easy to put together, fun for the students, and very helpful you teachers as we make instructional decisions.


Quizizz can be used at any point during instruction.  You can then show the questions in slide show mode so you can explain and walk through the most missed questions.


Want to see more?  Here is a short video walk-through of Quizizz.
You're Welcome!


What are some of your favorite tips and tools for classroom engagement?  Share in the comments section below. 

Tuesday, October 13, 2015

FTT - Interactive Timelines

Rethinking History With Interactive Time Lines

@joe_edtech/@LisaBerghoff

Creating historical time lines is certainly not something that is new to education. However, creating interactive time lines online really does represent teaching "above the line" in the SAMR model. And in fact, with the power and versatility of these tools, you can do some really outside the box things with interactive time lines. 

When I started writing this post, I was looking at a "free" tool called Tiki Toki - and I haven't even linked it here because the free version is incredibly limiting. But it really sparked my interest because in addition to being able to create traditional time lines of events, enhanced with video, pictures, maps, and text, the creators suggested you could use it to create enhanced project time lines. For instance, if there is a complex, multifaceted group project your students are working on, they could input dates, details, and goals into the time line to help organize their thinking. However, like I said, the free version of Tiki Toki really only lets you create one fairly static time line. When it comes to educational tools - one size does not fit all, and there is usually more than one good choice.

So, I went searching for something better, and genuinely free to use. Christopher Pappas of eLearning Industry provides a list of 10 truly free interactive time line creation tools specifically for the classroom. In my opinion, the best of this list, and one that is completely compatible with Chromebooks, is called myHistro. Combining a truly easy to use multimedia platform with all of the very best ideas from Google Maps, myHistro provides students with a platform for explaining historical events, planning trips, functions, or projects, mapping out important events or plot developments in a piece of literature, or organizing and archiving personal trips. The embedded video below explains how to get a free myHistro account and how to get started on time line creation:


One way to introduce this tool is to provide this software as an option for your students if you are having them create a project for your class. Rather than having them make a PowerPoint presentation or a Prezi, give them the option of making a myHistro time line.