Tuesday, December 13, 2016

FTT - Beginner Tips for School Gmail


You've Got Mail!

5 Beginner Tips to Get You Started with Gmail

@LisaBerghoff/@joe_edtech


As we make our way through the transition from Outlook to Gmail, we will continue to provide you with resources, tips and tricks. Many of you are figuring these out on your own and it's exciting to see colleagues sharing their new knowledge with one another. As a reminder, please use the Outlook To Gmail website, created by Ron K. You can find it by clicking this link. I recommend that you bookmark it by clicking on the star located in the URL bar in Chrome. 

Here are 5 Tips To Get You Started...

1. Know How To Get To Your Mail

Gmail is web-based, which means you can access it from any device on the internet. You can get to it by opening a browser tab, preferably in chrome, and click on "mail".
You also have the option to get to it from your apps doc. If you add the gmail app from the chrome store, you can pin it to the taskbar on the bottom of your screen.


2. Set Up Your Signature

This is a great first step because it will help you learn how to go into the settings menu. You just click on the gear in the upper right corner of the mail screen and click settings. Don't be overwhelmed by what you see there. There are many options in gmail and you have plenty of time to explore and check them out, pace yourself! You will notice that you are in the "general" tab of the settings page. Scroll down almost to the bottom of the page and you will see where to add your signature. Yes, you can copy and paste your old Outlook signature in your gmail signature box. After entering your signature, scroll to the bottom and click "save changes"

3. Learn How To Set Vacation Notifications

It's almost vacation time! Make sure you go back into settings by clicking on the gear and click "settings". Stay on the general tab of settings and scroll to the bottom of the screen where you will see "vacation responder".
You can add your vacation message in the box and set the dates for that message to be automatically sent as a reply to your incoming email messages.


4. Get Yourself A Reading Pane and Mini Calendar

This one is very polarizing. People either love the reading pane or they hate it. I'm in the love it category so I was excited to see how easy it is to set it up. Click on the gear and click settings. Then, click the "labs" tab. You can enable or disable these features. Here, you will see the preview pane and the Google calendar gadget. Scroll to the bottom of the screen and click to save your changes. Then, when you go to your gmail inbox, you will click the icon just to the left of the gear and click "vertical split"
This will add your preview pane. You can adjust the size of your preview pane by clicking and dragging the line that separates the pane from the list of messages.


5. Choose A Theme

Is there a specific color that makes you happy? Maybe you have a vacation photo that makes you smile. Set a theme for your gmail by clicking on the gear and clicking "themes". You can choose an existing theme or use one of your own photos. You can adjust the contrast for your text background, blur or darken the edges of your theme. 

These first steps should help get you started in the world of gmail. I know that intially it may feel like trying to cram a square peg in a round hole, but I believe that this is an opportunity for us to work together and learn from one another. It's so interesting to me to learn the different styles and preferences people choose for their email. It also gives me pause and makes me reflect on what it was like to teach without email at all. The fact that we can communicate with each other, our students, parents, and community members at lightning fast speeds still amazes me. We've come a long way!


Have you found some new and favorite features in gmail? Feel free to share below. 

Tuesday, December 6, 2016

FTT - Google Calendar

Getting Started With Google Calendar

@joe_edtech/@LisaBerghoff

Even before I started in District 113, I've had teachers and administrators ask me about the best way to take advantage of digital learning platforms. There are tons of great things to do, but my experience tells me that the biggest game changer is the ability to share live digital calendars with our students. As an adult, I have grown to rely on calendar reminders, emails, and text messages to remind me of important upcoming events. I know that a simple calendar with due dates and test dates would have made me a better student in high school. 

That's why I was always stunned by the fact that we had teachers and staff on one digital platform and our students on another. In order to share calendars with students, we were asking our teachers to live in two different digital worlds. Our switch to Gmail changes all of that and I'm really excited about the possibilities.

There is too much to know about Google Calendars to share everything in one post, but today I want to focus on what I believe are most important things to get started using Google Calendar well: settings, sharing, viewing and hiding calendars, editing events.

Settings:

Every Google App has its own settings so that you can customize it to work the way you'd like:

There are two ways to get to your calendar settings. The first is to click the pull down menu bar from "My calendars" on the left hand side of the screen:

Or, as with every Google App, you can click the settings gear in the upper right hand corner:
The first thing I changed in settings was "Default event duration." In Outlook, the default for a meeting was always 30 minutes. I like to events set at 60 minutes. But you have several different choices. However, the most important part about settings has to do with how you view your calendar. I like to look at it this way:

I want to see the whole week, including Saturday and Sunday, at one time. Notice at the top of Google Calendar, you can choose to look at your calendar by Day, Week, Month, 4 Days, or as an Agenda. However, one of those will be a default view. In other words, every time you open your calendar it will default to...something. I like the Week view. But in settings, you can choose any of them.
You can also set a Custom view for your calendar. If you only want to see a five day calendar, you can make that a Custom view and then set that as your default.

Sharing Your Calendar:

You can change share your calendar with colleagues, spouses, or students by clicking on the pull-down menu bar next to your individual calendar and selecting "Share this Calendar" from the list:

I don't expect everyone to be as open and public as I am, but my calendar is shared with anyone who wants to see it. People who add my calendar can only see when I'm free or busy, and they can't make any changes to my calendar, but anyone can see my calendar. By default, we should share our calendars within District 113 with free/busy times so that admin assistants and department chairs can see your calendars and propose meetings during common free times.

But, you can also choose to share your calendar with individuals. In the example I've included below, I've shared my calendar with several of my colleagues and my personal Gmail account with different permission levels. If someone sets appointments for me, I want them to be able to see all events and be able to edit events.


Viewing Calendars:

In the example calendar I posted above, I can actually see 3 calendars at one time. The first is my normal work calendar, which shows my scheduled school events. The second is my calendar for home, which shows when my daughter's concerts and school events are, when my wife or daughter has something important planned for us to do, and when I need to mentally prepare for family coming to visit (this shared home calendar has prevented many arguments and created some measure of family peace - I highly recommend a shared calendar at home). The third calendar doesn't have many events on it, but it is the most important. It shows when I have tickets to see Rogue One: A Star Wars Story. For easy differentiation, my work events are in grey. My home events are in red. And my Star Wars events are in Orange.

You can hide or view your different calendars by clicking on their titles on the left hand side of your Calendar screen. In the example below, I can see the Joseph Taylor, Birthdays, Brian Verisario, and DHS Library calendars. However, the Free Tech Tools Tuesday calendar is hidden (The color block is white and the text is greyed). 
If I click on the Birthdays, Brian Verisario, and DHS Library calendars, they will be hidden from my overall view. But all I have to do is click them again to make them reapper. If you decide that you want to get rid of a calendar, or if you want to change the default color for a calendar, take your mouse and hover over the particular calendar, then select the pull down menu for the calendar:


From here you can select "Hide this calendar from the list," which means it won't appear on your calendar or in your list of calendars any more. Or, you can simply choose a new color for easy differentiation.

Editing Events:

While you can do an event quick add by simply clicking on the calendar and typing in the name of an event, you can add a ton of information and invite other people to events by clicking the "Edit event" button.

At the top, you can add a title, change the date and/or time, or make the event an "All day" or "Repeating" event. You can also put the event on a different calendar. For instance, I could use the pull down bar next to Calendar to add this to my home calendar instead of my work calendar. You can add a description, add an attachment (especially useful if your are using this with students), color code individual events and add guests. My favorite part about Google Calendar, though, is the fact that you can decide what notifications to add - and how frequently. And I can choose to be notified by email, web browser, or SMS text notification.

By the way, I would love to be able to set the calendar so that all of my students can be notified of major events through SMS text messaging - but I can't. These are individual settings. However, in calendar settings, everyone can set up default notifications. So, you can walk your class through that process or send a short hand out home so that parents know that kids can set up text notifications.

These are just the basics for getting started. There is a lot more information to come, and both schools will be setting up hands on training sessions in the very near future.


Tuesday, November 29, 2016

FTT - New Google Sites

Google Put The "NEW" in Google Sites!


@LisaBerghoff/@Joe_EdTech

I recently had a chat with a good friend who is in sales. We were talking about the holiday shopping season and buying trends. My friend made a comment that I found particularly interesting. She said, "It's very easy to sell people what they already have and love".  This certainly seemed true when I went home and looked into my closet. I am only a little bit embarrassed to share with you that I own more than 3 pairs of black pants and several gray tops.  I try to mix it up, but find myself gravitating back to what feels comfortable and what works for me. 

Her comment made me think about our relationship with Google products. We love that we can collaborate, easily share, auto-save, and track our changes on Google docs, slides, sheets, forms, and drawings. The one product that has been a bit of an anomaly is Google Sites, Google's website creation tool. For the past few years, teachers and students have commented that Google Sites is not at all intuitive.  It doesn't have those wonderful features that make us go back to Google products over and over again. 

Over the summer, Google announced that a new version of sites was being tested with a small group of customers. Our district staff was chosen to be part of the Early Adopter Program so we could get our hands on the new version of Google Sites as soon as possible. About two weeks ago, our students were granted access to the new Google Sites via Google's rapid release program. 

Teachers who have used the new Google Sites are pleased that those familiar and favorite features of other Google products are now part of the website creator. We can now hang Google Sites in our closets right next to docs and all of those black pants! Yes, it means that I need to re-do all of my Google Sites training videos, but I am excited about the new features that we now have. 

Here Are The Main Features In The New Google Sites:

1. Drag and Drop Editing: 

The "classic sites" version has several drop down menus and settings to change. The new Google Sites allows you to add items to your webpages by dragging and dropping to add content and rearrange items, including images and other media. 

2. Real Time Collaboration and Save:

Yes, you can add editors to your classic sites. However, only one person can be editing on a page at a time. Everyone else is locked out while the page is being edited. The new Sites allows for real-time collaboration much like multiple editors on a Google doc. Multiple editors can work on a web page at the same time and see the changes happen live. Also, your edits will automatically save. When you are ready to go live, you can publish to your organization or to the web. Once you publish, you can continue to edit your site. 

3. Design For Multiple Devices:

Classic sites users know that webpages often only display well on standard computer monitors. This is not realistic as we know that our students, parents, and other teachers are often using devices like smartphones and tablets. The ability for the display to adjust and scale to other screens is called responsive design. The new Google Sites themes use responsive design so they look great no matter what size screen you are using. 

4. Very Easy Access To All Of Your Drive Content And Ability To Embed External Content:

Since Google basically started from scratch with the new Google Sites, it makes sense that there is more streamlined connectivity with all of your content stored in Drive. You can also grab an embed code to embed external content, such as an article or favorite blog post. That's a hint!

Do not panic if you are using classic sites and are not ready to make a switch!

Google has announced that "Classis Sites will continue to exist in parallel to new Sites as we add capabilities to new Sites that are similar to those found in classic Sites". Beginning in 2018, Google will send timelines and instructions for gradually migrating from classic to new sites. 

In other words, the new Sites is very pared down right now and as they are adding more features they will keep classic sites open. They will offer advice and instructions on how to make the switch eventually from classic to new. 

If you are curious and want to see what it looks like, just click the Sites icon in your apps doc, which is the collection of nine dots in the upper right corner of your screen. When you click the red "create" button, you can choose new sites and check it out. If you are just starting projects where your students are creating sites, I would go ahead and have them create using the new version of Sites.  

As always, I'm here to help you figure it all out, or just offer some moral support as you try these new tools with your students. 

Here is a 3 minute video created by GSuite. It shows you how to get started using the new Google Sites. 

And for those of you who are reading to the end, I want you to know that I am thankful for you!
Here is a little gift. It's a video from my favorite president: Kid President. He offers up 25 reasons to be thankful. I hope it makes you smile. He tends to have that effect on people.


--------------------------------------------------------------------------------------------------------------

Are you using the new Google Sites? Feel free to share your comments below.

Do you have things to add to the list of reasons to be thankful? Please share!


Tuesday, November 22, 2016

FTT - Triventy

From the Triventy Website
Sharing the Load: Collaborative Online Quiz Creation with Triventy

@joe_edtech/@LisaBerghoff

It is the day before Thanksgiving Break and I think one of my friend's Facebook Posts from last night summed up everyone's feelings perfectly, "I have decided that I no longer want to be an adult. If anyone is looking for me, I will be in my blanket fort, coloring."

It has been an eventful and crazy Fall. After suffering through 108 years of abject failure, the Cubs won the World Series and an entire region of the country came together to celebrate a victory which transcended baseball. As a country, we are dealing with an election cycle that more closely resembled a badly staged reality TV show than anything I've ever seen before. Even still, with seismic social events going on, our lives, and our students' lives, go on. Kids are dealing with classes, activities, medical issues, family issues, stress about the future, and the pitfalls of navigating everyday spaces in high school. This Fall, more than almost any other, I'm conscious of the fact that our kids need us to talk to them - they need to know that there are adults who care about them and will be there for them. It is a reminder that the most important thing that we do is teach kids, not content.

But having said that, class goes on. And we are faced with meeting the challenges of providing our students with the skills and knowledge necessary to be successful at the next level. Especially when demands are high, and timelines are tight, I think we have to find ways to share the load and work together. If we've lost some class time this Fall because of, well, the world interfering with our plans, we at least have great colleagues on whom we can rely and with whom we can collaborate. 

Generally speaking, the Free Tech Tools that we choose to share are selected to provide you with a different way of engaging students. Today's tool was selected as a different way of engaging your colleagues and capitalizing on our shared ideas and efforts.

Most of us are familiar with online quiz/gaming tools like Socrative, Kahoot, and Quizlet (see our previous blogs for detailed information about all three). Triventy.com is not a paradigm shifting online quiz platform. It is an online quiz platform that makes it easy for several teachers to work together to create a quiz. Need to pare down a lesson to its most important skills to save time? Or do you want to spend a little time during your late start working together focusing on the essential questions from a unit of study? Triventy.com is a tool that can facilitate some of that work.

Start by going to Triventy.com and sign up for a free account. Since Triventy integrates nicely with Google Classroom, make sure that you use your district email account when you sign up. Also, in order to use the full product for free, you'll need to select the Free Edu version and identify District 113 when you sign up.

Once you've signed up and you begin writing your first quiz, the platform will look a lot like other quiz creation tools. You can add images to identify topics. You compose questions and answer choices. Decide if you want the questions to be worth points and have a right answer, or serve as a poll/discussion starter. There is even a place to provide hints and feedback.


What makes Triventy different, though, is the ability to invite others to add questions to the quiz.


Once you click the button to invite question contributors, you get a link that you can share with your colleagues in a variety of different ways (email seems to be the most efficient). Your colleagues click the link and add questions. As the owner of the quiz, you can always decide to edit or remove any questions that have been added to your quiz. Also, if you have a group of people adding questions, their will be an author's name attached to each question. No question is submitted anonymously.


Finally, since you can integrate the tool into Google Classroom, you can actually invite your students to create quiz questions. Never underestimate the power of asking your students to find the right questions to ask! The same rules apply to students. They cannot submit questions anonymously, and all questions they submit will have to be approved by the quiz owner.

Here is a short video introduction to Triventy.com from Richard Byrne, author of the Blog Free Technology for Teachers. (I highly recommend his blog - if you are ever stuck for an idea, that is a great place to start.)


-------------------------------------------------------------------------------------------------------------
Got any other tools that help you share the workload with your colleagues? Tell us about them below!


Tuesday, November 8, 2016

FTT - Google Drive App

Google Drive: A Safe Place For All Of Your Files 

Top 5 Reasons To Use Google Drive Desktop App!

@LisaBerghoff/@Joe_EdTech


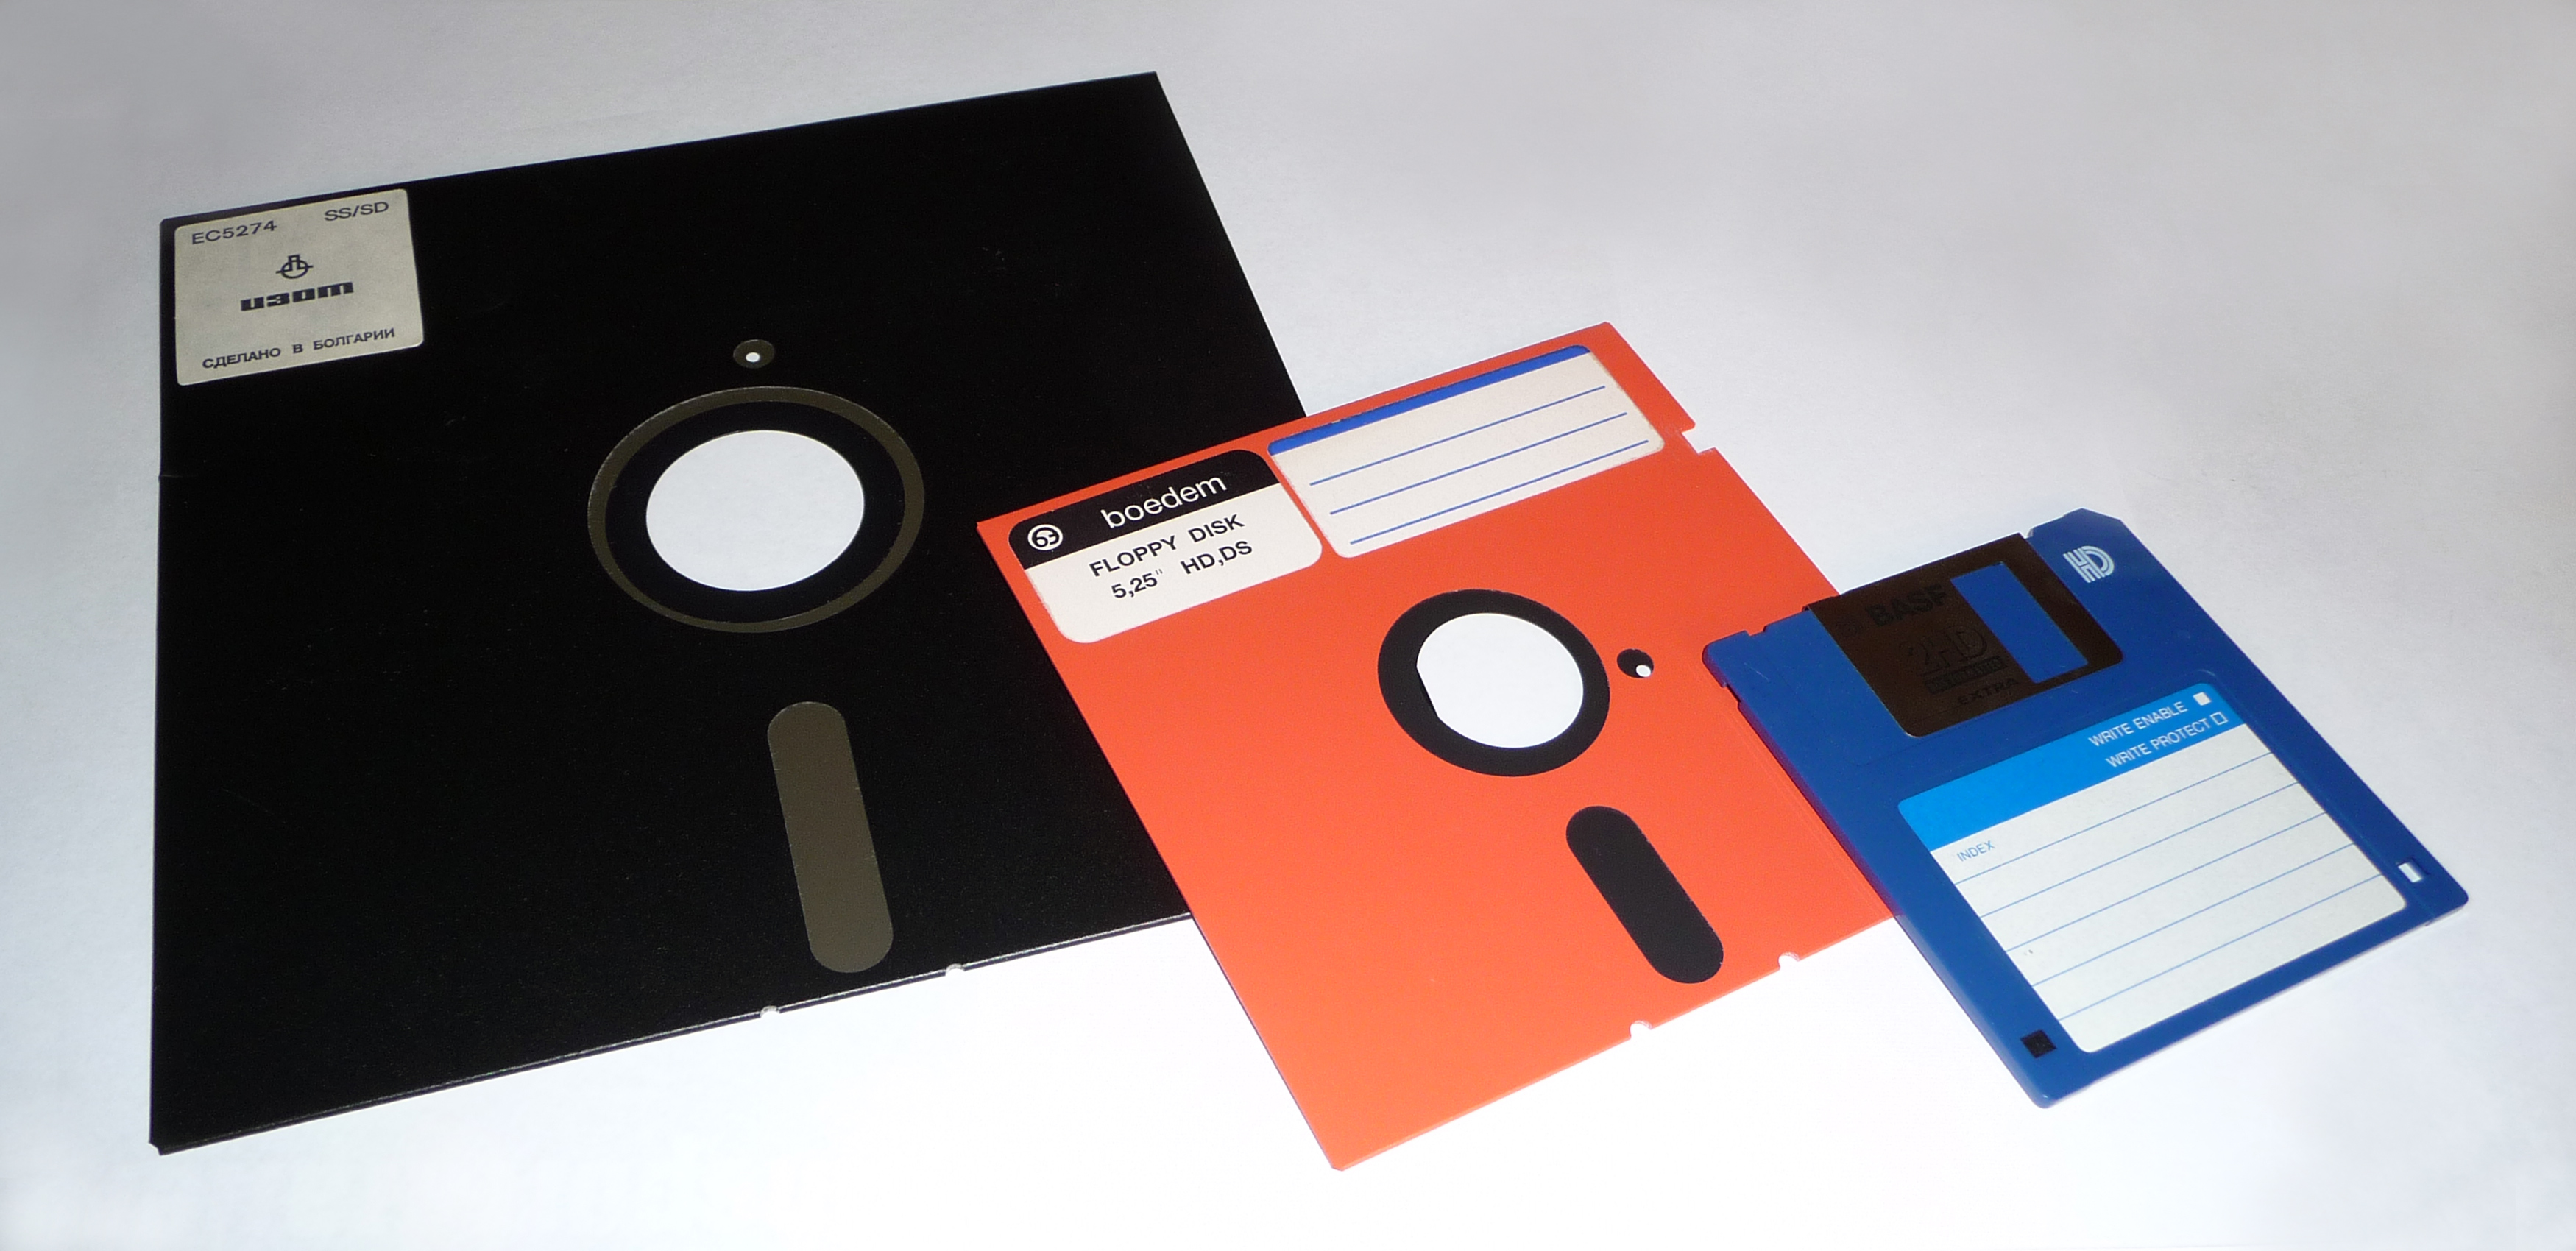
I recently cleaned out some boxes in my basement. I've lived in my house for 10 years and I had boxes that had been moved but never opened. I found several hard, opaque, plastic cases. My son opened them and had absolutely no idea what was inside. The cases were filled with floppy disks. Remember those? They made it possible to save, store, and transport digital files. It wasn't that long ago that we were carrying around and sharing floppy disks.

There are many things that I get nostalgic about when I think about the 80's and 90's. Floppy disks, however, are not in that category. Today we have many options for cloud storage. The latest and greatest of those is Google Drive. Before I explain the Google Drive desktop app, here is a 2-minute video that explains the cloud. So many of you have asked and it's a great question! Enjoy:


Now, here is what you should know about the Google Drive Desktop App.

Did you know that you can use Google drive to store and sync your files (not just Google files) across devices AND access then offline, without a browser like Chrome or Explorer? You might be saying to yourself, wait a minute, I already use the Google Drive web app. Why would I also need the desktop app?

I'm so glad you asked! Even though they are both called Google Drive, and use the same symbol, they are actually different apps and serve slightly separate functions. The functionality of the desktop app is primarily for file sync, storage, and backup. Files placed in your desktop Google Drive folder will be synced to the web. It works the other way too. If you have files uploaded online and shared with you by others they will also be synced to the Google Drive folder on your computer for local (offline) access. The web app gives you all of the other functionality including the ability to access deleted files, revisions, share files, edit Google docs, search your files, and the list goes on. When used together, these two apps provide functionality with very few limitations.

Here, as promised, are the top 5 reasons to use the Google Drive desktop app:


1. Sometimes I just want my documents to stay in Word, or Adobe, or Photoshop when I edit them because the formatting needs to stay the same.

Have you converted a PDF to a Google doc only to find out your perfect table or chart is in complete disarray? Use the Google Drive desktop app to store your files but then use the original program to open and edit them. Problem solved:)

2. The internet is not always so reliable.

We've all been in class, or in meetings, or at home, when the internet seems to be having a bad day. Or, perhaps you are editing a large video or audio file and the internet can't seem to keep up. Use the Google Drive desktop app to store and sync these files but edit offline.

3. I'm getting the feeling that I'm using up too much space on my network share. 

If you have that feeling, it's probably because it's true. Go with your gut on this one.  The Google Drive desktop app has unlimited storage, and it won't get in anyone's way like file cabinets and shelves. 

4. I have things saved in a million places, and if my computer crashes I'm in big trouble!

Don't worry! With the Google Drive desktop app you can easily put everything in one place and can organize with folders. Your files and folders will sync so it won't matter what machine you are on. 

5. Downloading and transferring files couldn't be easier.

Once you have the Google Drive desktop app set up, you can just drag and drop your files or whole folders to transfer them. Or, if you want to use this as an opportunity to weed out some of the files that you are no longer using, you can choose and transfer. 


Ready? Here's how to do it...

Your Google Drive Desktop app is probably already on your computer. You can search for it by typing in the search bar on your desktop. If you don't see it, you can contact the tech office and they will make sure it is there for you. Once you click on it, you will need to enter your school email and password for sync purposes. Once it is set up, you will notice a new icon on your desktop that looks like this: 


When you want to save and store a file, you can launch the app and drag the file into Google Drive. Or, you can choose Google Drive as the save destination. It will now show up as one of your options as you can see here:


Interested? Still have questions? No problem, I am here to help. Don't hesitate to contact me and we will sit down and set it up together.
---------------------------------------------------------------------------------------------------------------------
Already using the GDrive desktop app along with the web app? Use the comments section below to share your thoughts. 


Tuesday, November 1, 2016

FTT - VideoNot.es & Google Drive

Flipped or Blended - Make Taking Notes on Videos Easy and Visible with VideoNot.es

@joe_edtech/@LisaBerghoff

One of the common complaints I hear about Chromebooks is how difficult it is to multitask on them. Sure you can open an endless number of tabs across the top, but moving between tabs to accomplish goals can be difficult. So, what do you do if you have a presentation or a video you want to give to your students, but you also want them to actively take notes or synthesize material?

If you are using an online video, VideoNot.es could be a great solution for your students. An add-on to Google Chrome, VideoNot.es allows you to split your screen and watch an instructional video on the left and take time-stamped notes on the right.


And because it is all integrated with Google Drive, it is simple to share notes in collaborative groups or just between student and teacher.

VideoNot.es can be found on the Chrome Web Store by clicking here. VideoNot.es is an extremely simple tool to use, but here is a quick video demo from Teacher's Tech:


-----------------------------------------------------------------------------------------------------------

What notetaking or multitasking shortcuts have you found for the Chromebook?

Tuesday, October 25, 2016

FTT - Google Read & Write

Improve Reading and Writing Confidence With Read&Write


@LisaBerghoff/@Joe_EdTech


Remember the first time you saw Google docs? The whole idea of students being able to share documents, work collaboratively, embed links, images, etc. regardless of the device and regardless of physical location still completely blows my mind. The list of things we are now able to do to help our kids learn keeps growing but one thing remains, reading and writing is key for student success in any  subject area.Yes, even math. The big question is, what do we do when we have students who are struggling with reading and writing? There is a company called TextHelp whose mission is to bring literacy to life for everyone. They have several amazing products but today I want to highlight my favorite. 

Read&Write for Google is an extension that is free. Many of our students are already using it but may not know the full extent of what it can do. For those of you who are new to Read&Write, it allows students to hear words, passages, or whole documents read aloud with highlighting that makes it easy follow. It has both a text and picture dictionary. Students can hear words translated into many languages. The read aloud and translating features are free for everyone. TextHelp gives teachers their premium version for FREE and it's yours forever (their words not mine). To sign up and get your free premium version, click here after installing the extension. Students can sign up for a fee 30 day trial of the premium version. The upgraded version, which is completely free for teachers, also has word prediction, speech to text, voice notes, highlighted text can be automatically converted into a new document. The list goes on because TextHelp is constantly adding features. 
Read&Write works on Google docs and on any web based text. For example if you have students reading an article on National Geographic's website, they can use the read aloud features for that article, hopefully with headphones. The premium version also includes pdf, epub, and kes files. 

Adding and using Read&Write is extremely easy. Just go to the chrome web store from your apps doc or click here. Once you click to add Read&Write, you need to give it permission to access your google account. Once it is successfully installed, you will notice a little purple puzzle piece that will show up near the top of your screen. Clicking on that puzzle piece activates the Read&Write features. As you hover over the icons, you will see text pop up that explains what everything does, though I bet you can guess which button stands for "play" and which one stands for "stop".

Helping your students add Read&Write is going to be a breeze because it's the same process. The kids can control the speed and the voice that is used for the read aloud by clicking on the gear icon in Read&Write. Since it is an extension, it will work on whatever device the student is using, as long as they are logged into chrome.

Giving your students access to Read&Write helps them to utilize the supports that they need independently. I'm not sure how it looks in your classes but in my biology class, having a teacher sit next to you and read to you can really negatively affect your self esteem as a student. When my students are able to use supports in a way that does not draw attention, they are more likely to use the supports. Also, having those supports available gives them more confidence in their reading and writing and therefore makes them more likely to participate actively in class. 

Here is a short video introduction to Read&Write:


Are you or your students using Read&Write? If so, post in the comments section below and let us know how it's going. 

Tuesday, October 18, 2016

FTT - Quizlet Live

Racing Towards Mastery with Quizlet LIVE

@joe_edtech/@LisaBerghoff


A couple of weeks ago, I was conducting a site visit at DHS and we walked into one of our Spanish classes. The kids were excitedly working together, competing in teams using a tool called Quizlet Live. I've used Quizlet a lot as a flashcard generator, but I hadn't seen Quizlet Live. It is an easy to use tool that turns group activities into fun and challenging games. So, I had to ask the teachers to write about it. This is the resulting
guest post by DHS Spanish Teachers Mercedes Koch (@Profe_Koch) and Matt Wallace

Do your students use Quizlet to study key vocabulary terms?  Do your students like to play collaborative and interactive games in class?  If so, Quizlet Live is perfect for you and your students!

In the very recent past, Quizlet has released Quizlet Live, which takes existing Quizlet sets and creates a collaborative, interactive game using the information contained in the set.  The general idea is very similar to that of Kahoot!.  However, there are a few differences which will be highlighted below.  Here is a brief overview of how to access Quizlet Live and how to play.

Step 1: in order to access Quizlet Live, you must request access.  Email beta@quizlet.com  with your username and request access to Quizlet Live.  You will receive an email once it is active on your account and at the top of each Quizlet set you will see this icon:  


Step 2: When you are ready to start a game with a particular set, click “Live”.  You will be taken to a page with a “Create Game” link.  Click “Create Game” and the next step is when your students will become active.  The next page will look like this:


You will want to project your screen to the class so that the students can see and enter the code at quizlet.live.  They will enter their names, and the names will show up in the black portion on the right side of the page.  If a student enters an inappropriate name, simply click on the name to erase it and ask that student to re-enter their information.

Step 3: When all students are in the game, and when you click Create Game, Quizlet will randomly group the students in your class into groups of 3 or 4 and the groups will be given a team name. Apparently Quizlet is very animal-friendly because the team names are always names of animals.  You will want the students to sit next to each other during the game, so they should find their teammates and sit next to them at this point.  You are now ready to start the game.

Step 4: The actual game consists of the students seeing some sort of question posed to them, a vocabulary term for example. Then, they are given multiple options.  However, not all students on the team will have the correct answer as one of their options.  This is where the collaboration comes in. They also see the options given to their teammates.  This is what a student sees:

The middle column contains their options and the two columns on the sides contain their teammates’ options.  The students must discuss to determine the correct answer, and the student with the correct answer on their screen is the only one who can select it.

One difference between Quizlet Live and Kahoot! Is that the questions posed to one group will be different from those posed to another group.  Let’s say that your Quizlet set has 50 terms.  Each group’s questions will be a completely random sampling of those 50 terms.

Step 5: How does a team win?  When a team answers a question correctly, Quizlet Live automatically moves them onto the next question (which is different from Kahoot! where everyone is working on the same question at the same time).  While teams are accumulating points, the teacher screen tracks their points:
The first team to 12 correct answers wins. HOWEVER, when a team answers incorrectly, their points are reset and they start over at zero.  The new questions posed to the group are again chosen at random from the set, not a repeat of what they already answered.

A few extra notes:  
  • If you want to play another game/round but also want change the groups, you can do so with the click of a button.  
  • You can add students to the game using the game specific code.  
  • After completing a game, you can see the stats of the game.  This may be helpful for identifying common misconceptions related to the content.

--------------------------------------------------------------------------------------------------------------------------
I'd like to thank Mercedes and Matt for "volunteering" to write this week's post. If you are using a cool free tool to improve learning in your classroom, tell us about in the comments below - or email me and author an upcoming post!


Tuesday, October 11, 2016

FTT - Seesaw

Student Driven Digital Journals and Portfolios? Yes Please!

@LisaBerghoff/@Joe_EdTech

This week's free tech tool comes to us from HPHS world language teacher Weifang Wang (@WangWeifang).


The sweet spot for teachers of any content is when you have students who are taking ownership for their work, reflecting on their learning, and articulating all of that both in and outside of the classroom. As a teacher, the joy is in guiding students towards learning and then getting out of their way so they can express their understanding of new ideas, concepts, and analysis of information, while connecting this new understanding in a way that is meaningful.

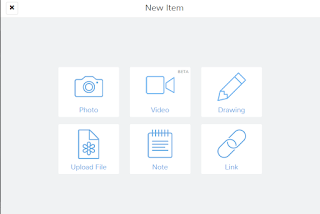
The Seesaw platform is designed for student-driven digital portfolios. It is so simple to use, it quickly became a favorite of elementary teachers because kids can truly do it on their own. What I love about Seesaw for high school students is that even though it is easy to use, the tools are powerful and robust. As we are searching for tools that help us to differentiate for all of our students, Seesaw allows for students to add photos and videos (uploaded OR recorded on Chromebooks), drawings, links, text, notes, or files to be uploaded. Once added, our students can write captions or leave voice recordings of their reflections. Seesaw also has the ability to set up a class blog for you. You can password protect it and decide if you want to allow comments. Once your blog is set up, both teachers and students can post to it. 

Here's how it works:
1. Students log in using their Google account and they input the class code that teachers get when they create a class.

2. As a teacher, you can post to an entire class or just to select students. You might post a prompt and ask your students to show their work, reflect, and respond.

3. If you just want your students to begin without a prompt from you, they can click on the green plus button to add an item. Students can easily use their Chromebook camera to take photos or videos and add them into their seesaw journal. 

4. Once they have added an item, your students will add a caption OR leave a voice recording that talks about the work they are displaying. 

 5. Teachers must approve students' journal entries so we are able to help guide them towards habits that will help them create a positive digital footprint. While they are learning, Seesaw provides a safe environment. Seesaw has earned a very high rating on common sense education, which is a very respected reviewer of educational applications. 

From another perspective, as a parent, it is difficult for me to know what is going on with my kids schoolwork now that they are doing so much of their work digitally. I can't just go into their backpacks and look through their folders (thank goodness!). All of the digital work can be unnerving because I want to support my kids and have conversations about what they are doing in school. 
Seesaw makes it easy to connect parents to see their students' work and be able to have a "window into my child's school day", according to the seesaw website. This of seesaw as a communication platform between students, parents, and teachers.  

Seesaw can be used on any device and the free version has an outstanding platform with features that students will actually want to use. 


Here is a screenshot of my first photo journal entry to my Seesaw class!


Are you using Seesaw or digital portfolios and blogs in your classes? Post in the comments below and share your thoughts. 

Tuesday, October 4, 2016

FTT - uBlock Origin

Decommercializing the Web for the Classroom (and Maybe Home, Too)

@joe_edtech/@LisaBerghoff

Today we are proud to start featuring Free Tech Tools proposed by some of our classroom teachers. This guest post is from DHS Social Studies Teacher, Dan Kim (@TheMrKim).

I had always considered myself to be a price-savvy, prudent consumer who wasn't susceptible to the same greasy advertisement schemes, ploys, and tactics that suckered the rest of society.

And then I began shopping for an engagement ring.

One of the best and worst parts of planning a proposal is the immense pressure of creating that perfect moment of astonishment and surprise.The mental gymnastics involved in somehow discretely acquiring a person's ring size, or moving the little ring box from its original hiding place in the bathroom closet, into a much safer, much smellier left tennis shoe in the middle of the night, speaks volumes of the necessity for discretion.

You could then imagine my horror when after a few nights of researching engagement rings online, my browsers were now full of engagement ring related ads and pop-ups basically screaming at my girlfriend that things were about to get real.

Now if you've done any amount of online shopping, you will either find it creepy or helpful that firms will often keep tabs on your search history to populate relevant ads on your websites. Led by internet giants like Google and Facebook, ads have become more and more sophisticated and pronounced.

IMBD Site WITH Ads
This is where a neat, light-weight Chrome Extension called uBlock Origin comes in. uBlock Origin will filter and block the majority of ads that you see and experience on the web. Without going too deep into the ethics of ad blocking, it is safe to say that ads are detrimental to the classroom environment.

IMBD Site WITHOUT Ads - uBlock Origin
Ever try to show a YouTube video in class that was preceded by an inappropriate, awkward, and unskippable commercial? Or see a popular website taken over by large, obnoxious advertisements? uBlock Origin can help.

Perks of uBlock Origin:

  • Websites will load faster
  • Mobile users won't have to waste data on bandwidth-hogging commercials or advertisements. 
  • Filters advertisements that contain viruses, malware, and phishing messages.
  • Block all ads on YouTube


Once installed, users will not have to do anything to enjoy the benefits of uBlock Origin. It's a simple plug-and-play extension that works so well that at times I forget it’s even installed!

Now there are a few things to consider once the extension is installed. Some websites have caught on to ad-blocking, and will not allow users access to their sites until the ad-block is disabled. Users can simply pause uBlock Origin by clicking on the giant power button on the menu on the top right corner of your browser.


Are ads disrupting your online educational experience? Feel free to post comments below!
--------------------------------------------------------------------------------------------------------
Gotta free tech tool you'd like to share? Contact Lisa or Joe to be a guest blogger!