Showing posts with label Assistive Technology. Show all posts

Monday, December 4, 2017

FTT - Nearpod

Turn Any Presentation Into an Interactive Presentation with Nearpod

@Joe_EdTech/@LisaBerghoff


Originally posted for DHS in 2015 - Revised and updated for 2017!

When I was teaching full time, I would frequently use PowerPoint Slide Shows in class. The secret I never told my students is that the important things that happened in class, the real moments of cognitive engagement, had little or nothing to do with the PowerPoint Slides. Mostly I used the slides to keep myself on topic - and sometimes that worked.

In class, I really wanted the students to engage in the conversation with me. I didn't want them to just spew historical facts back at me, I wanted them to think about the situations that arose, try to understand why people acted the way they did, postulate what they might have done differently, and so on. But what I mostly saw when I used PowerPoint was a furious dash to write down every word that was printed on the slide as if it were Gospel. And why did they do that? Somewhere along the line they learned that what was important in class would be on the next exam, and everything that was on the next exam would be written on the board or included in the slide show (and yes, I'm sure that I was complicit in that at some point).

Nearpod is a Web 2.0 tool that offers us a chance to change the game a little. If you use Nearpod, and your students download the app to their Chromebooks, you can push presentations to them so that each slide appears on the screen of their device. If they are of the type that wants to write down every word, they can actually just take screenshots and go back to engaging in the discussion in class. Not only that, though, Nearpod gives you a chance to insert polls, quizzes, and other interactive slides into your presentations. With all of the power of a student response system, you can embed formative assessment into your classroom presentations and ensure some level of universal participation. You can even have students create drawings or graphs using their track pads, and share individual drawings to the entire class.

At the risk of being accused of burying the lead, though, Nearpod also serves one other purpose for your 1:1 classroom. While I am still of the mindset that the best way to make sure that your students aren't distracted by the technology is to be engaging with your teaching, teachers who are new to the 1:1 environment often cite classroom management/device management as one of their major concerns. If you use Nearpod for classroom presentations, you can easily see which students are actively engaged in your classroom activity. There is even an "attendance" button on the top left of the teacher screen that lets you see if any of your students have navigated away from your Nearpod presentation. So, while it doesn't lock your students into one screen, it gives you clear evidence of who is engaged in the lesson, and who is not.

Here is Nearpod's short explanation of how it all works:


On the upside, Nearpod continues to offer updates that make the product better and more efficient. With a free personal account, you can present PPT presentations or presentations saved to PDF. You can also share those presentations with other teachers. Additionally, the company recently rolled out a feature that allows students to see quiz and poll results whether they are seeing a teacher led classroom session or an asynchronous session. On the downside, they would really like for you to pay for a school or district license, which really means that storage is limited in the free version. But, this is a pretty decent tool to use in a 1:1 classroom no matter which device your students are using.

--------------------------------------------------------------------------------------------
Have you used Nearpod with your class? Or do you have another classroom presentation / classroom management tool that you use? Tell us about it in the comments section below.

Tuesday, December 6, 2016

FTT - Google Calendar

Getting Started With Google Calendar

@joe_edtech/@LisaBerghoff

Even before I started in District 113, I've had teachers and administrators ask me about the best way to take advantage of digital learning platforms. There are tons of great things to do, but my experience tells me that the biggest game changer is the ability to share live digital calendars with our students. As an adult, I have grown to rely on calendar reminders, emails, and text messages to remind me of important upcoming events. I know that a simple calendar with due dates and test dates would have made me a better student in high school. 

That's why I was always stunned by the fact that we had teachers and staff on one digital platform and our students on another. In order to share calendars with students, we were asking our teachers to live in two different digital worlds. Our switch to Gmail changes all of that and I'm really excited about the possibilities.

There is too much to know about Google Calendars to share everything in one post, but today I want to focus on what I believe are most important things to get started using Google Calendar well: settings, sharing, viewing and hiding calendars, editing events.

Settings:

Every Google App has its own settings so that you can customize it to work the way you'd like:

There are two ways to get to your calendar settings. The first is to click the pull down menu bar from "My calendars" on the left hand side of the screen:

Or, as with every Google App, you can click the settings gear in the upper right hand corner:
The first thing I changed in settings was "Default event duration." In Outlook, the default for a meeting was always 30 minutes. I like to events set at 60 minutes. But you have several different choices. However, the most important part about settings has to do with how you view your calendar. I like to look at it this way:

I want to see the whole week, including Saturday and Sunday, at one time. Notice at the top of Google Calendar, you can choose to look at your calendar by Day, Week, Month, 4 Days, or as an Agenda. However, one of those will be a default view. In other words, every time you open your calendar it will default to...something. I like the Week view. But in settings, you can choose any of them.
You can also set a Custom view for your calendar. If you only want to see a five day calendar, you can make that a Custom view and then set that as your default.

Sharing Your Calendar:

You can change share your calendar with colleagues, spouses, or students by clicking on the pull-down menu bar next to your individual calendar and selecting "Share this Calendar" from the list:

I don't expect everyone to be as open and public as I am, but my calendar is shared with anyone who wants to see it. People who add my calendar can only see when I'm free or busy, and they can't make any changes to my calendar, but anyone can see my calendar. By default, we should share our calendars within District 113 with free/busy times so that admin assistants and department chairs can see your calendars and propose meetings during common free times.

But, you can also choose to share your calendar with individuals. In the example I've included below, I've shared my calendar with several of my colleagues and my personal Gmail account with different permission levels. If someone sets appointments for me, I want them to be able to see all events and be able to edit events.


Viewing Calendars:

In the example calendar I posted above, I can actually see 3 calendars at one time. The first is my normal work calendar, which shows my scheduled school events. The second is my calendar for home, which shows when my daughter's concerts and school events are, when my wife or daughter has something important planned for us to do, and when I need to mentally prepare for family coming to visit (this shared home calendar has prevented many arguments and created some measure of family peace - I highly recommend a shared calendar at home). The third calendar doesn't have many events on it, but it is the most important. It shows when I have tickets to see Rogue One: A Star Wars Story. For easy differentiation, my work events are in grey. My home events are in red. And my Star Wars events are in Orange.

You can hide or view your different calendars by clicking on their titles on the left hand side of your Calendar screen. In the example below, I can see the Joseph Taylor, Birthdays, Brian Verisario, and DHS Library calendars. However, the Free Tech Tools Tuesday calendar is hidden (The color block is white and the text is greyed). 
If I click on the Birthdays, Brian Verisario, and DHS Library calendars, they will be hidden from my overall view. But all I have to do is click them again to make them reapper. If you decide that you want to get rid of a calendar, or if you want to change the default color for a calendar, take your mouse and hover over the particular calendar, then select the pull down menu for the calendar:


From here you can select "Hide this calendar from the list," which means it won't appear on your calendar or in your list of calendars any more. Or, you can simply choose a new color for easy differentiation.

Editing Events:

While you can do an event quick add by simply clicking on the calendar and typing in the name of an event, you can add a ton of information and invite other people to events by clicking the "Edit event" button.

At the top, you can add a title, change the date and/or time, or make the event an "All day" or "Repeating" event. You can also put the event on a different calendar. For instance, I could use the pull down bar next to Calendar to add this to my home calendar instead of my work calendar. You can add a description, add an attachment (especially useful if your are using this with students), color code individual events and add guests. My favorite part about Google Calendar, though, is the fact that you can decide what notifications to add - and how frequently. And I can choose to be notified by email, web browser, or SMS text notification.

By the way, I would love to be able to set the calendar so that all of my students can be notified of major events through SMS text messaging - but I can't. These are individual settings. However, in calendar settings, everyone can set up default notifications. So, you can walk your class through that process or send a short hand out home so that parents know that kids can set up text notifications.

These are just the basics for getting started. There is a lot more information to come, and both schools will be setting up hands on training sessions in the very near future.


Tuesday, September 20, 2016

FTT - Custom Search

Custom Search With Google


@LisaBerghoff/@joe_edtech


I grew up in a time when phones had cords, photos were taken with film that needed to be developed, and research was done with encyclopedias. I am amazed each and every day that my students have current, quality information at their fingertips and that communicating with experts on the other side of the world is possible with the click of a mouse. When students have questions, one of my favorite phrases to use in my class is "you have a very powerful computer in front of you, let's look it up!"  They will eagerly go to Google and type in a few words or a phrase to search. Inevitably, they will get somewhere in the order of 23,000,000 responses in .41 seconds. How amazing is that!? However, the excitement starts to wane as my students begin to sift through their results. Many educators believe that proper search skills are imperative for success in the future and I agree. Google has a whole curriculum for teachers about effective search skills. Click here to access Google Search Education. 

It can be tricky to teach search skills when the internet can be such an unwieldy place to learn. I was at a #GAFEtalk sponsored by TextHelp last week and learned about an incredible tool called Custom Search.  I don't know how I never came across this before but I'm happy to share it with you now. 

Custom Search was developed for users to add a search engine to their websites. When you are on a website, you may notice a search bar that says "search this site". It allows you to search for content that is located on just the website you are on. 

This has HUGE implications for the classroom.

Here is an example:
In my biology class, we are currently studying trophic levels in Yellowstone National Park. I want my students to search for information, but I don't really want them to search the entire internet and then spend their time sorting through potentially bad sites. I can create a custom search for them, it looks just like a Google search, but will allow them to search within certain sites, such as NationalGeographic.com or NationalParkService.gov. I might want some of my students to search a site like newsela.com, where they can adjust the reading level. I will create a custom search for them and that will be their platform for finding information.

  • Begin by going to the Custom Search Homepage
  • Click "create a custom search engine" or "new search engine". 
  • In the sites to search box, type one or more sites you want to include in the search results. You can include any sites on the web. Don't worry, you can add more later.
  • In the "name of the search engine" field, type in a name to identify this search engine. I will call mine Yellowstone Research.
  • When you are done, click "create".
  • Click on the box that says "public URL" and that is the link you will share with your students though your website, Hapara, Google Classroom, or however you share digital information in your class.
  • You can make several adjustments to your custom search including turning off image search, enable speech input for the search box, format the layout of the results, and see some of the analytics for your custom search.

Here is what it looks like:

5 Ways/Reasons to Use Google Custom Search

1. Easy differentiation. The search looks just like Google search but some students will do better with different search results.

2. Really focus and hone in on specific websites. Tired of students trying to take the easy way out with wikipedia? Not anymore!
Save time and frustration when students are searching.

3. Enable students to search and choose, but just stay within the sites you want them to use.

4. It allows students to search without needing to leave the page or site that you are on.

5. Your students will be researching sites that you have already vetted as high quality.


Are you using Google Custom Search? 
What are some ways you would (or do) use this in the classroom?
Go ahead and post comments below. 


Tuesday, September 6, 2016

FTT- Recap

Video Reflection Made Easy with Recap!


@LisaBerghoff/@joe_edtech


More and more, we are asking our students to reflect on their learning. We want them to think about their thinking and we want to know what they are thinking! Having a conversation with each student to hear about their thought process and connections they are making is an unbelievably powerful tool for teachers. Regular conversations are often tricky to schedule, time-consuming and then there is the matter of what the rest of the class is busy doing while you are meeting with each individual student. Many teachers have been dabbling with the idea of video reflection as a means for more frequent formative assessment. Given that each of our students has a Chromebook with a webcam, this is a fantastic idea.

I am so excited to introduce you to my new favorite free tech tool, Recap, the free video response and reflection app! This app gives you a secure, and user friendly way to use video in the classroom. It is brought to us by a company called Swivl. They make that amazing Robot camera that moves as you move around the classroom. They completely understand the power of video images for learning.

Recap allows students to respond on video to questions created by their teacher and then it asks them to rate their response. Student responses are recorded privately, within the app, and teachers can then review answers all in one place. This easy to use format gives teachers insights into how individual students are thinking, while also collecting data on the whole class. Since Recap can be used on any device and is so easy to use, it can be utilized for frequent video formative assessments. There are many options for sharing responses so teachers can highlight or share responses with parents, case managers, other teachers, or an entire class.
How it works...


  • Teachers assign a question or group of questions to a student, a group of students, or a whole class. The questions can be in text or video format. The teacher can decide how long the student responses can be, the shortest is 30 seconds and the longest is 2 minutes. Students do not have to use the whole time. 

  • As students respond, teachers can watch their videos and leave written feedback for them. They can also share responses with other students for peer review, teachers, or parents. 

  • Teachers can look at the whole class's data and see how they rated their responses.

Ready to give Recap a try?


Just go to Letsrecap.com and sign in as a teacher. From there, you can have your students create private student accounts or you can use your class pin and add student names. When your students enter your class, they will click on their name. 

When you sign up, you will be given a "demo class" with some student video responses already there for you to try. You can set up assignments and give feedback in your demo class just to try it out and see how it works.

Here is a 2 minute quick start video from Recap:


Recap Quick Start from Swivl on Vimeo.


Are you using video reflection in your classroom? Going to give Recap a try? Feel free to comment below!

Wednesday, June 8, 2016

Not a Free Tech Tool

Stolen Image from Amazon.com - but since I'm sending
business their way, my guess is that they will be thrilled.

I Will Never Get Through My Reading List!

@joe_edtech


Frequent visitors to my blog (Hi Mom!) will know that I usually dedicate my time to discussing free tech tools to use in the classroom. Money is tight in every school and I take the responsibility of finding and teaching quality tech tools accessible to ALL very seriously. So, my Free Tech Tools posts will return in the Fall ("Winter is coming!" - House of Stark). This post is really all about you, and how one tech tool may be worth the investment.

I love to read. However, my time is limited. I have a hefty commute to and from work every day. I have my school work and I'm writing a pretty substantial research study. And, I have a 14-year-old daughter that demands and deserves a fairly significant amount of whatever is left of my free time. While I do read for pleasure in the few spare minutes remaining, I find it isn't enough.

For instance, I just read The Girl on the Train, and I found it compelling. It is hard to put it down and walk away - so I didn't. I bought the Kindle book and downloaded it to my iPad, and I bought the audio edition as well and loaded the Kindle app on my phone. The reason is that WhisperSync from Amazon.com actually syncs the Kindle version with the audio. So, I read a chapter at night on my iPad, then got up and listened to the next couple of chapters on my phone on the drive into work. When I got back to my iPad, it would sync to the last page I heard in the audio book. 

This is available for virtually any book that is available with both a Kindle version and an Audible version. So, the downside is that it sometimes costs a little extra. You do have to pay for the Kindle version, but you can usually add the Audio for free or at a significantly reduced cost. For instance, if I were to buy Stephen King's 11.22.63, it would cost $8.99 for the download, but the audio is actually included in the cost.

WhisperSync is a service of Amazon.com, which owns both Kindle and Audible. Click here for more information.

I hope this helps you enjoy your summer break just a little more, and get closer to getting through your reading list. Then, next Fall, we'll talk about kids who might benefit from hearing the story while they read it. :)
---------------------------------------------------------------------
Have other tips for teachers as they head to a summer of recalibrating and learning? Tell us about them in the comment section below.

Tuesday, April 12, 2016

FTT - Google Keep

Do You Have To-Do Lists On Your To-Do Lists? Organize and keep it all straight with Google Keep.

@LisaBerghoff/@joe_edtech


Spring is here! The sun is shining earlier in the morning, the birds are chirping, the winter coats are getting closer and closer to the closet. I'm hoping to actually put them away very soon. This time of year always motivates me to clean out the clutter and reevaluate my organizational systems. My friends who are not teachers often make comments like "Oh, things must be winding down for the end of the school year." Ha! Those of us who work in schools know that the end of the year is actually something along the lines of running full speed into a brick wall.  Fourth quarter just gets busier and busier until it comes to a screeching halt.  I often wonder how it will all get done. This is when I really need some help with productivity and organization. My to-do lists start branching off into other lists and I begin to worry that something is going to fall through the cracks. 

Our buddies at Google have created a little known tool called Google Keep. Google Keep is a note-taking service that allows you to make virtual sticky notes. You can create lists, use images, color code your notes, and of course share your notes with others so you can collaborate and keep everyone in the loop.  GKeep is friendly, colorful, and easy to use. Also, you can use your Google apps account information to log in so there is no need to create a new account and create another password that you may or may not remember. There is a GKeep app that can be added to your android phone, iphone, or tablet. Think of Google Keep as a digital version of that little notebook that you may carry around with you. I keep a composition book in my bag and will often write little notes to myself or start brainstorming ideas in that book. With Google Keep, I don't need to have my book with me because I can access it from pretty much anywhere.
Screenshot from Lisa's computer using GKeep

Using Google Keep (or GKeep as the cool kids call it) makes a lot of sense for helping to keep track of your own to-do lists, big ideas, reminders, etc. As with all Google apps, it saves automatically and syncs to all of your devices. You can also add labels to make it even easier to locate all of your incredible ideas and important information. Of course you can search your notes so when you have amassed a large amount of amazing, inspiring, thought-provoking ideas you can retrieve them without a problem. 

When I think of classroom applications for GKeep, I know my students would benefit from using it when they are working on group projects. Imagine if a group of students used shared to-do lists which they can check off as tasks are completed.  Or at the very start of a project, they could create notes to keep track of their brainstorming thoughts. When we think about next generation skills, we know that being able to effectively work in groups on collaborative projects is extremely important. 
Students can use Google Keep for their own notes in class and can set reminders based on date and time OR location. For example, it can be set to remind me to update my blog when I get to my house. 

Got 47 seconds?  Here's an informational video about Google Keep:


What are some other ways that you use Google Keep in the classroom? Feel free to share in the comments section below.

Tuesday, March 22, 2016

FTT - Tools to Maximize YouTube in Class


Maximize The Benefits Of YouTube, Minimize The Annoyances

@LisaBerghoff/@Joe_Edtech


It is so exciting to see how many teachers are taking advantage of YouTube in the classroom. According to Digital Stat Articles 2/14/2016, 82% of internet users aged 14-17 use YouTube. It makes sense that we would leverage this user- friendly, engaging, massive collection of videos for our students' benefit. There are endless possibilities when it comes to learning applications with video. As much as I love YouTube, there are a few minor inconveniences that can feel not so minor when you are in front of a room of 25 adolescents.  First of all, how often have you cued up an amazing video for your class but first you must awkwardly sit through a 15 second commercial?  I am usually just crossing  my fingers that it's an ad for something that is  age appropriate and extremely boring. Otherwise, guess what my students take away from the whole lesson?  That's right! All of that time I spent searching for the perfect video is completely wasted because of one 15 second ad.  Ok, here's another one.  The video is over, the students were completely amazed and are ready to discuss, apply, and extend what they have learned (work with me here) but YouTube shows an entire screen of additional videos that I may or may not want to show.  While we're at it, does anyone else find the strip of related videos down the side of the screen very distracting?

You get the point.
What's a teacher to do?

I have a few tools for you to try that are designed to eliminate these annoyances and maximize the benefits of video.

Adblock for YouTube 

This is a chrome extension which means it lives in the upper right corner of your chrome address bar. Little known fact, that chrome address bar is called the omnibox. There will be extra credit for anyone who uses the word omnibox in a sentence today. The Adblock for YouTube extension magically takes away those ads that automatically play before your actual video plays.


Quietube and Viewpure


Removing the video ads is wonderful but what Quietube and Viewpure do is absolutely amazing. These free tools eliminate the distractions such as suggested videos, comments, and ads.  When you go to Quietube's website you will be very underwhelmed. These are no frills tools that deliver on their promise to do a specific job. All you need to do on your end is drag the quietube button up to your bookmarks bar and when you are watching a video on YouTube, simply click the button.  You will get a clean screen with nothing but a viewing box showing your video.  Viewpure works very much the same way.  You can drag the "purify" button up to your bookmarks bar or insert the YouTube link into the space on the website and click "purify" to get the new link. Under the viewing box you can click to get a short link to share with your students so they too will only see the video.  You can put that link into Google classroom or whatever system you use to  share content with your class.  When your students click the link, they will view the video in quietube format.  You also have an option for a black background.  Here is a 35 second tutorial:


DF YouTube (Distraction Free) 


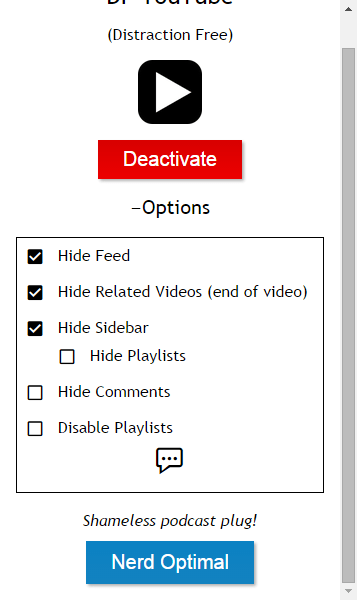
If you're still reading this post then your persistence will be rewarded. I have saved the best (in my opinion) for last.  DF YouTube is a chrome extension that takes away the ads, thumbnails, video recommendations grid that appears at the end of a video, comments, etc.  The extension makes all of these settings configurable!  You can click on the extension and click "options" to easily check or uncheck what items you would like to hide.  The one downside to DF YouTube that I can see is that it does not give you a link to share with your students.  This extension is perfect for displaying a video to a group.  If you are sharing a video with students and you want it to be without the distractions, I would suggest using Quietube or Viewpure.


As we continue on this journey of transforming education through the use of new tools and a new way of thinking about teaching and learning, I am confident that video will remain a fan favorite in our classrooms.
-----------------------------------------------------------------------------------------------------------------
How are you using YouTube with your students?  Post in the comments below. I'd love to hear from you!

Tuesday, December 1, 2015

FTT - Bee Line Reader


Easy On The Eyes! Read More In Less Time With Bee Line Reader

@Lisa Berghoff /@Joe_EdTech


In the past several years there has been a giant push for educators to have a better understanding of literacy skills.  We know that reading is imperative for learning and we know that comprehension plays a major role in multiple subject areas.  However, certain aspects of reading that often get overlooked are fluency,  decoding speed, and tracking ability, especially when dealing with reading digital text.  As more and more of our text is presented in digital format, it is necessary for educators to explore ways to help our students follow what they read with increased speed and decreased eye strain.  

Bee Line Reader makes reading faster and easier by making a color gradient that guides your eyes from the end of one line to the beginning of the next.  I have been using the Bee Line Reader for 2 weeks and this simple tweak does seem to be helping me with both focus and eye strain.  The Bee Line Reader is an extension that can be found in the chrome web store.   You can use it as much as you want for free for 30 days. After that, you can continue to use it 5 times per day for free or upgrade to the pro version.  

I believe that the Bee Line Reader can benefit all of our students, but it might be a game changer for our kids with dyslexia, ADD, or students  who struggle to decode. 

Here's the explanation of how it works, while using the Bee Line Reader:

Tuesday, November 24, 2015

FTT - Online Mind Mapping/Coggle

Reading Tragedies... Wait, Are We Talking About Shakespeare?

@joe_edtech / @LisaBerghoff

My daughter, 14 year old Princess in training, has an IEP because she struggles with reading comprehension. I am just not sure if her case manager hates it or loves it that Katherine's dad is a professional educator. I think she hates it because I ask questions that can sometimes be pointed (maybe snippy). For instance, this year I asked what "reading strategies" she had used in the classroom. The answer was, "I'm sorry, what are 'reading tragedies?'" - Yes, I actually felt my aorta pulse.

So, after the meeting, I went right to the source. I asked my daughter if she learned more from her reading teacher at school, or from the private reading tutor I hired. After I got past the initial discussion about, "Dad, I love all of my teachers equally," I finally got the answer I was looking for. "Well, the stuff that I read in school is all pretty much the same, and very boring. The stuff I read from the reading tutor is a lot more exciting, and I understand it and remember it a lot better." Of course, her comment speaks to the importance of reading selection, but she went further. "With [the private tutor] we make a lot of mind maps and it helps me remember things a lot better."

Mind Mapping! Concept Mapping! How often we forget to take such a simple step even when we know most of our kids are visual learners. In my district, we used to use a very expensive piece of software to do this; but in the era of budget cuts, we may or may not have access to expensive, limited use pieces of software. However, concept maps are important whether we are talking about reading strategies, note taking strategies, or simple brain storming activities. I know of three great Web 2.0 tools for creating concept maps collaboratively, without spending a single dime.

The first is relatively new to my repertoire, but it has come to be one of my favorites. Coggle is a web tool, also available as a Chrome App on the Chrome Web Store, that not only allows students to create colorful and dynamic mind maps, it also allows for easy interaction between groups of students and teachers. One of the newest features to Coggle is a chat window where collaborators and teachers can leave notes or engage in live chat, which means, like most good Web 2.0 tools, students can be working synchronously, asynchronously, independently, or with an instructor.

Rather than linked geometric shapes, Coggle mind maps look organic, mimicking connections in the brain. Furthermore, Coggle makes it extremely easy to use color and format text. When the mind map is complete, there is no need to print. You can share it with any user online, store them in folders on your Coggle account, and even organize them in Google Drive. If there is a negative to this tool it is that all mind maps are public - meaning anyone can view the Coggle's you make. That could be a positive, if you are working on a subject that is new to you, you can search through existing Coggles to see how others have mapped the concepts.

Here's a short video intro to get you started with Coggle:


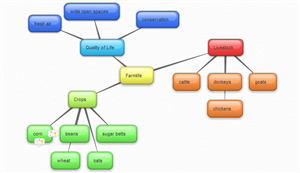
The map to the left, a more traditional mind map, was created in a Web 2.0 program called bubbl.us. For free, you can go to bubbl.us, create an account and start making concept maps. What's more, you can create teams and collaborate on concept maps with other users. With a simple click, you can download your mind map as a .jpg or .png and embed it in a document or on a website.


Google Draw Screen Capture
An often overlooked tool for mind mapping is Google Drive. In addition to docs, spreadsheets, and presentations, you can create Google Drawings. Once in the drawing, you can add, and add text to shapes and "call outs" (think the comics page in your Sunday Newspaper). As with all Google Drive products, it is simple to collaborate and share your work with other users. Drawings can be embedded on Google Sites, in Docs, and in Presentations, or you can simply download them as .pdfs.

If your class is BYOD, or uses iPads or iPhones, there is an excellent iOS App called iBrainstorm that allows users to create simple concept maps with sticky notes. Collaboration is possible, but trickier on the iPad App. But if you connect several iPhones to the same iPad, you can actually "flick" sticky notes from one device to another.

The Chrome Web Store offers several others that might be worth a try, including: ConnectedMind, MindMap, MindMeister, LucidChart, Mindomo, and Mind42.
----------------------------------------------------------------------------------------------------------------------
I'm aware of free software packages like Vue or FreeMind, but are there other Web 2.0 solutions out there like this? If you are using Mind Mapping Software in your class, please share your favorite in the comment section below.

Tuesday, October 27, 2015

FTT - Vibby

Sharing Specific YouTube Video Content With Your Students

@joe_edtech / @LisaBerghoff

Warning, the beginning of this blog is a red herring - included because I simply couldn't believe a certain reality. Lisa and I both had an opportunity to attend a pretty remarkable professional development opportunity in the Houston school district. Instructional Technology professionals from across the country got together and visited some pretty innovative magnet schools in a very economically challenged part of the city. After the site visit, we all gathered and talked about some of the things we saw happening in the classes and somebody said something like, "I think it is great you can embed YouTube videos into your website, but what can we do? YouTube is blocked in our district." (I will return to the discussion of the innovative classrooms later, at the moment I am going to wallow in the righteous indignation of someone who can't believe there are school districts who still block YouTube!)

"Start at:" in YouTube
So, I get it. There is a lot of garbage on YouTube. But there is a lot of good stuff on YouTube, too. Blocking YouTube is something akin to slicing off not just your nose to spite your face, but your head to spite your face. Silly.

However, not only are there a lot of videos on YouTube I'd like to share with my students, there are a lot of PARTS of YouTube videos I'd like to share with my students. Here are two ways to better focus your lessons on the specific video content.

From YouTube itself, you can share a video with your students and have it start at a specific point. When you are on YouTube, queue the video to your preferred starting point. Then, rather than simply copying the URL and posting the link on your website or in an email, you can click the "Share" link found underneath the video, click the button to "Start at:" a certain moment in the video. Then copy the custom link that appears in the "Share" window with your students.

Alternatively, if you would like to share parts of a longer video with your students, you can use a tool called Vibby. After you create a free account, you can select any YouTube video and "Highlight" specific sections. You can choose 1 section, or several. After you title each section, or add a brief note, you can share a custom link with your students. They will only see the sections of the video you've highlighted. One of the things that makes Vibby a great tool for school is that your students don't need an account to watch you custom video. When they click the link you sent them, they see something like this:


While Vibby is a great tool for sharing videos with your students, if you want to use YouTube videos to "Flip" your lessons or embed questions in YouTube videos, check out these posts:


Tuesday, October 6, 2015

FTT - Canva


Easily Create Beautiful Designs and Documents with Canva


@joe_edtech/@LisaBerghoff  


I talk to so many teachers who say "Oh, I'm really not a tech person".  Of course those of us who are into growth mindset understand that all that really means is that it will take time, hard work, and perseverance to improve on those skills.

Well, I'm here to tell you that I'm REALLY not a design person. The part of people's brains that makes sense of space and where things go in a room, on a page, or even clothing on a body just doesn't seem to be present in my brain.  I do, however, enjoy using tools that make it seem like I am a design person because I can still create amazing images even though I've had a little help.  I also understand the importance of visuals in the classroom and if you're going to use them, the quality needs to be fantastic.

Think about your students.  You probably have some amazingly creative students and you probably have some students who cringe at any sort of artistic project. We know that students learn best when they have multiple opportunities to work with new information in different ways.  Therefore, we often ask our students to create presentations but we don't give them information about basic principles of design and so we end up looking at powerpoint presentations that are filled with tiny text or images that crowd the screen.  That is why I'm excited to introduce you to Canva.com.

Canva allows you to create presentations, social media graphics, online posters, magazine covers, documents, marketing materials, etc. that look fantastic with very little experience in the world of design.  The website is free (there is also an ipad app) and there are thousands of free open source images to use, as well as some options for purchase.   Of course you can always use your own images and easily drag and drop them right into your Canva design.

Canva was founded by Melanie Perkins, who was teaching graphic design programs at the University of Western Australia.  When she realized that many of her students struggled with the basics on tope of trying to learn complicated programs, she decided to create an online tool that would allow new students to experience success with less frustration.
                                                                   

Screenshot of Canva Design School
The drag and drop format of Canva makes creating professional looking visuals straightforward and non-threatening.  There is also a "design school" tab with tutorials and teaching materials intended for classroom use. I managed to successfully navigate three of the basic interactive tutorials in about 15 minutes. The beginner's challenges  highlight basic principles such as the benefits of color and the idea that less is more.  Some of these may seem obvious to you, but to me (and many of your students) it was helpful to see and interact with the examples to observe the differences in design.  The Canva blog is fascinating and covers topics such as Powerful Examples of Visual Propaganda, and Build Your Brand: How To Choose The Right Fonts. 

I highly recommend that you take a few minutes to check out Canva.  You can easily create wonderful visuals to use in your teaching, or have your students get creative and share with you, each other, or the world.  How do you use the power of visuals in your classroom?  Post in the comments section below.
Canva image created by Lisa Berghoff

Tuesday, September 29, 2015

FTT - ActivelyLearn

Turn Any Text Into An Interactive Text With Actively Learn

@joe_edtech/@LisaBerghoff

Note: This is a repost from last year. I'm not cheating on my Free Tech Tool Tuesday posts, there have been a lot of updates to ActivelyLearn and I think it is worth another look. While I always suggest reading the whole blog post, click here for a synopsis of all that is new since the last time I posted about this. 

For years I have started presentations on integrating technology into the classroom by saying 21st century learners do NOT have short attention spans, they are simply not engaged by the kinds of classroom activities that engaged us when we were kids. My 13 year old daughter provides me with a perfect illustration of my point. 

I have heard from her teachers that at times she seems bored with their lectures and with some of their learning exercises, so she must have a really short attention span. Well, I don't think so. The last time the two of us drove to St. Louis from our home in the Chicago Suburbs (by the way, the most boring drive on planet earth) she spent the entire 5 hours actively engaged in building a city on MineCraft - a game, I might add, that has graphics that are less advanced than the Atari Game System I played when I was a kid. (By the way, Cognitive Psychologist Daniel T. Willingham offers some evidence to back up my mantra in his recent article, "Smartphones Don't Make Us Dumb.")

So, if it isn't the flashy graphics and ear pounding soundtrack, what do you like so much about MineCraft? She says, "It's fun. I can make decisions about what to do. If I get stuck, I can ask questions or look up answers. And if I build something I don't like, I can quick tear it down and build it better." I heard her say those words and I translated it into classroom speak: inquiry, autonomy, interactivity, the ability to make mistakes and then fix them.

So what if we applied just a few of those things to the practice of reading her school assignments? What if instead of receiving a static textbook or handout, she read on her mobile device and her teachers were able to ask her specific questions about what she read, point out things that are important in the reading and explain why they are important, and even embed videos to illustrate the point or provide a little direct instruction while she was at home? ActivelyLearn.com does all of that, supports any electronic text, and is incredibly simple to learn. 

Here is a brief intro from the ActivelyLearn.com website:

To get started, all you need to do is navigate to ActivelyLearn.com, create a free account as a teacher, and then create your first class. There are thousands of texts and lessons already included in ActivelyLearn.com, they may already have the text you are using for class. Once you've selected a text to use, you can embed questions, highlight important passages, provide the students with notes, embed videos, and monitor each individual's progress as they read. If they don't have your text, you can upload your own - however, with the free version of the program, you are limited in the number of digital texts you can upload.
A screenshot of my ActivelyLearn Workspace. Caution: Some of these features
are only available in the premium version - like importing G Docs.
ActivelyLearn will automatically generate an email you can send to your students to help them get signed up for your class, but I've created a one page handout you can share with them in order to get them signed up and signed on. (Click here for the "Signing Up For ActivelyLearn" Handout.)

ActivelyLearn works with any platform or device with an Internet connection, and there is a robust help section for both teachers and students. Click here for a list of video resources for getting started with and using ActivelyLearn.
--------------------------------------------------------------------------------------------
Are there other FREE tech tools you use to help support close or interactive reading with your students? If so, please tell us about them in the comment section below.

Tuesday, September 22, 2015

FTT - Booktrack Classroom

Booktrack Classroom: 

Read With A Soundtrack Or Create Your Own


@joe_edtech/@LisaBerghoff


I have been teaching reading, along with other subjects, to struggling learners for many years. Every subject area requires some interaction with text and as teachers, it is up to us to  find ways to guide students to improve their reading skills.  In order to be an effective reading teacher, I am constantly searching for ways to get kids excited about what they are reading.  One of the most powerful methods that I have found to hook kids into a story is to add audio as well as visuals. During a read aloud I often toss in a "Dun Dun Duuuuuuunnnn" at the end of a cliffhanger chapter.  Or, I will ask my students to imagine what they are reading as a movie going on in their mind. As teachers, we will do just about anything to help kids get into the reading. We want them to decode, comprehend, make connections and inferences as they interact with text.  We also know that music and sound has a profound affect on our kids.  Booktrack Classroom capitalizes on the compelling use of sound to enhance reading.

BookTrack Classroom is an application found in the Chrome Web Store that allows you and your students to create a movie-style soundtrack to go along with e-text. It currently has a library with some of the classics, including Frankenstein, A Tale Of Two Cities, and Macbeth, which already have soundtracks created.  The reader adjusts the reading speed so the soundtrack plays while you are reading and adds to your reading experience.  But wait, before you decide Booktrack classroom is not for you because you don't teach those books, you need to know about the other features of Booktrack Classroom.

It also allows students to create a soundtrack for any essay, story, or text that they can copy into the Booktrack studio. They can also generate and publish Booktracks for their own writing! (This is where you should be getting excited) Students can add sound effects, ambient sound, and/or background music to enhance the tone of their original essays, stories, poetry, or whatever they write.  We spend a lot of time talking about tone, theme, and figurative language in the classroom. Why not let our students show that they understand these concepts by choosing a piece of writing and creating a Booktrack to go along with it?  I'm already working on my Halloween ghost story so I can add amazing sound effects!  Booktrack Classroom does not provide text to speech, students must read on their own or do a read aloud.  This app allows you to sign in using your Google credentials, and it works even without an internet connection.

The app is currently free (for a "limited time") and includes complete lesson plans on topics such as sound and symbol, persuasive branding, and The Odyssey.

Check out the Booktrack Video here:

Do you have other apps or ideas for new ways to help kids get into their reading and writing?  I'd love to hear them!  Post them in the comments section below.


Tuesday, September 15, 2015

FTT - StayFocusd

Helping Kids Teach Themselves To Avoid Distractions

@joe_edtech

One of my favorite blogs is "Mind Shift: How we will learn," a product of Northern California's Public Media outlet KQED. One of their posts that came up in my Twitter feed this weekend was called "Age of Distraction: Why It's Crucial for Students to Learn to Focus." There have actually been a ton of studies done on this dating back to the 1970s. Some of my favorite pieces have come from Daniel T. Willingham, cognitive psychologist from the University of Virginia. Both the studies featured in the "Mind Shift" article and the ones from Willingham suggest that it is important for educators and parents to help kids learn how to manage distractions, especially distractions that are readily available to them on digital devices. This research, by the way, is one of the reasons I don't support the idea of simply blocking social media and other sites on school devices. That doesn't teach them discipline; it actually ignores the long term issue.

However, as you know, kids learn differently. Some of them require a little more direct instruction and a little more scaffolding of skills. StayFocusd is a free extension, available in the Chrome Web Store, that can offer a little assistance to kids who need it. One of the problems for some kids, and perhaps this director of instructional technology, is that they can get lost on distracting websites and not even know how much time they waste there. StayFocusd can help quantify wasted time and allow students to limit wasted time.
StayFocusd in the Chrome Web Store


The Nuclear Option
Once you add the extension to Chrome, you can set your own time limits on websites that might be distracting you from your real work. You can decide to enact the "Nuclear Option," which means, for instance, that you can set a specific amount of time that you are allowed to spend on Facebook. When that time limit is reached, Chrome will shut down that tab and the program won't allow you to navigate to the site again for 24 hours. You can also set an "active" calendar, meaning that StayFocusd will always manage your browser during school days, but on the weekends and during holidays, you can grant yourself a little more browsing time. For students who are afraid they might cheat and change the settings, there is a "Challenge" option. "If this option is selected, you will be required to complete a difficult -- but not impossible -- challenge before you are allowed to change any settings. This makes it inconvenient for you to change settings, therefore reducing the chances that you'll cheat" (StayFocusd settings page).

For some teachers, StayFocusd falls short of their ideal because it doesn't allow teachers or counselors to directly manage the student machines. However, I see that as a strength, because what we are really doing is providing the tools necessary for kids to teach themselves to be in control of their devices and their digital lives.

If there is a student you think could benefit from StayFocusd, please share it with them - and maybe their parents, too.