Tuesday, January 31, 2017

FTT- Flippity

10 Reasons To Try Flippity.

Easily Turn Google Spreadsheets Into Flashcards And Other Cool Stuff!

@LisaBerghoff/@Joe_Edtech

As  SuperBowl Sunday is just around the corner, I have had some funny conversations with various people about this huge event. My family usually watches the SuperBowl with several other families. Some of us are definitely there to watch the game, while others are excited to see the commercials. There are always a few who just want to watch the halftime show or eat some good food while being social.  While we are all there having a similar experience, we go into it with different perspectives and we come away from it with a wide variety of opinions regarding what was most memorable or interesting. 

This makes me think about my students.  They each come to my class and have a similar experience while looking at it from different perspectives and leaving with a variety of takeaways. One of my main goals as a  teacher is to maximize engagement so my students will be motivated to learn and make connections. 

Classroom engagement is often difficult to define because it can look different depending on the activity and the dynamics of the class. The Glossary of Education Reform defines classroom engagement as "the level of attention, curiosity, interest, optimism, and passion that students show when they are learning or being taught, which extends to the level of motivation they have to learn and progress in their education." 

My never ending search for what will bring about attention, curiosity, interest, etc. often leads me to new and interesting online tools. I recently learned about Flippity as part of an online community of teachers called "Connected Classrooms", where teachers share information about what gets their kids excited about learning. Being part of these communities helps push me out of my comfort zone and trying new things in my classroom. 

Flippity is an add-on for Google sheets. Add-ons are built by developers outside of Google. They run within a specific Google product and they aim to serve a specific purpose. Flippity is a series of web apps that can easily turn your Google spreadsheets into flashcards and quiz games. There are also templates for teachers that will create random groups of students or mix and match activities. There is even a badge tracker to keep track of accomplishments and a certificate quiz, all just using your Google sheets data. It's really very simple but the possibilities are vast. 

Here's how you get Flippity;
When you click on the "free" button, a new spreadsheet will open. You may need to give it permission to run first. 
Click Add-Ons and then click Flippity and then click "pick a template". There, you will see all of the different templates you can try. 

Here are Ten Reasons To Try Flippity:

1. Flashcards
The Flippity flashcards are easy and simple to make. They also include lots of options such as adding images and having the text read aloud. You can also play matching games, print your list, or print a quiz. 


2. Flippity Quiz Show
This is my current favorite. I love playing games in class and this template makes it so easy! Just put in your categories, questions, and answers and it's ready to go. 


3. Flippity Hangman
Turn data from your spreadsheet into a hangman-style game in a few short minutes. Ready to solve the puzzle?

4. Flippity Spelling Words Manager
I know in high school we don't really do spelling words but we do teach reading and work on vocabulary. This list manager could be very helpful in helping kids organize new words. It has list, practice, and quiz modes.

5. Flippity Random Name Picker 
Popsicle sticks are great for random calls on students, but they can get a little tired around this time of year. With the random name picker, you can choose one student or groups of students quickly and easily. Since it's random, no complaining right?
6. Flippity Mix and Match
Turn your spreadsheet data into a mix and match grid. Click to move the text around until it matches up and makes sense. I used to cut out tiny pieces of paper for this activity!

7. Flippity Badge Tracker
Badges are all the rage. They allow both child and adult learners to have something visible to mark an accomplishment or a level of achievement. The big problem is keeping track of it all. Give this simple, streamlined badge tracker a whirl.
8. Flippity Progress Indicator
Just like the badges, tracking progress in a data table can be hard to read and confusing. This progress indicator shows very clearly who has done what. Color coding makes me very happy!


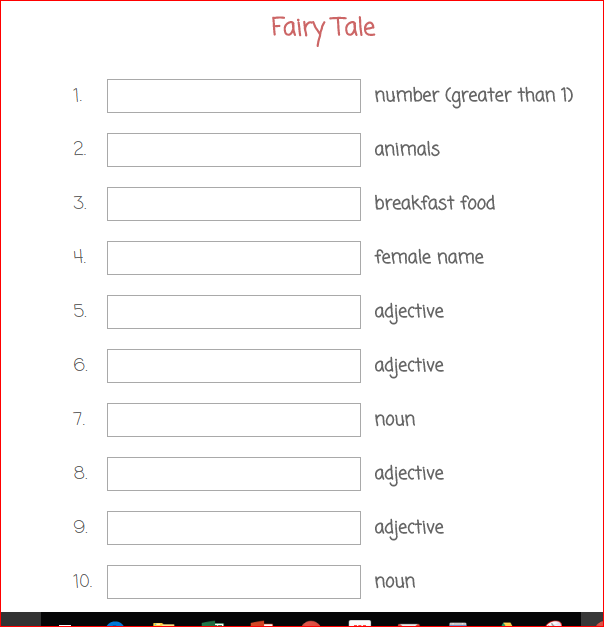
9. Flippity Mad Libs
This fun and funny story telling technique can be a wonderful classroom activity. Just fill words in the blanks according to the parameters given and it wil generate our story. 
10. Flippity Certificate Quiz
Take a quiz, get the answers correct, print a certificate that shows how well you did. Nice!


As you can see, Flippity has many options to help engage your students. I would encourage you to give Flippity a try. If you have questions, concerns, or just want to check it out with a buddy, please let me know. I'm available to help!


Monday, January 23, 2017

FTT - VoiceThread

Enhancing Classroom Discussions and Presentations with VoiceThread

@joe_edtech/@LisaBerghoff

Guest Post by DHS English Teacher 
Kristan Jiggetts

One of the things that I love about technology is the way in which we can enhance what we already do.  Discussions and presentations are important elements in any English classroom. However, many students dread these assignments. I can relate.  As a shy teenager, I struggled with participating in class discussions. Speeches and presentations gave me anxiety to the point where I would avoid going to school. That way I would miss presentation days and have to make up the work with the teacher. VoiceThread is helpful in providing students opportunities to hone their presentation and speaking skills in a less threatening environment which then allows students to make the jump to in-person presentations/speeches and discussions with more confidence.
VoiceThread.com- Presentation Alternatives!

Are you looking for an alternative to PowerPoint with the power of screencasting? Do you want your students to work on their presentation skills?  Do you want your students to show what they know through a presentation but do not want to take 5 class periods to get though everyone in the class? VoiceThread is the answer!
Beth Ahlgrim introduced me to VoiceThread a few years ago. The software allows students to create presentations that they can then verbally annotate - as if they are giving a presentation to the class, but without the anxiety and time pressures in-class presentations can cause.
I found screencastify to be kind of clunky, and for our students with loaner chromebooks or chromebooks that have sustained a bit of abuse, inoperational.  VoiceThread solves the chromebook mic issue by allowing users to comment in different ways: using a cell phone, a traditional computer mic or even the webcam. Since students can record and re-record their slides to their heart’s content, the site helps students work on their speaking skills.  This would be an excellent tool for any classroom.  
For collaboration purposes, VoiceThread works to help connect students in an online environment where they can view class presentations at their own pace and comment using a microphone, video or text comment.  This allows for differentiation and also helps out in the event that students are absent.  The material is always accessible!

Here's a quick video from educator Jenna Moore to help you get started using VoiceThread:


VoiceThread is one of those Free-ish tools we've discussed in a number of posts. The free version allows you to create up to 5 VoiceThreads for free. If your PLC or course team is really interested in using VoiceThread at a high level, or frequently, you can consider asking the department or building to support a premium license for education.
------------------------------------------------------------------------------------------------------------------------
Do you have another tool you use for classroom presentations or discussions? Please tell us about it in the comment box below.

Tuesday, January 17, 2017

FTT- YouTube Live

Harness The  Power Of Video!

Quick-start Guide to Using YouTube Live for Screencasting and Recording 


@Lisa Berghoff/@Joe_EdTech

Teachers everywhere are realizing that the workforce of the future is not about rote memorization and complete compliance. We are looking for new and different ways for our kids to communicate what they know and hone their communication skills in a wide variety of media including face to face, email, texting, social media, video chats, and the list continues to grow. I have seen an increase in our building of teachers looking for more ways for kids to demonstrate their skills via video. There are many fine free screencasting and video editing tools. However, they  each have their limitations and these can easily become barriers, forcing teachers to decide to bail on the whole idea of utilizing video for student assessment. As we approach 2nd semester, I hope you will consider this type of activity for your classes. You will find it very interesting to see that students can show their mastery and skill levels in many ways. 

I'm happy to share with you that this past September Google Hangouts On Air moved to YouTube Live. This is primarily designed for live streaming but works as an outstanding tool for screencasting and video creation that saves seamlessly with YouTube. Many of us have concerns about having our students put themselves out there on YouTube. It is important to remember that videos on YouTube can be made public, unlisted, or private. Teaching students about these settings is important so they learn how to make decisions about who is allowed to see their content.

Here's a quick-start guide to YouTube Live to get you started:

1. Log in to your YouTube Account using your district credentials. 

Did you know you had a YouTube account? Well, you just learned something new!

2. On the left side of the screen, click where it says Live Streaming:


When you click on Live Streaming, you will open a new screen and you will see the words:
"Stream Now" and under it, "Events". As much as you are tempted to click on Stream Now, The Events Button is the one that you want.


3. Click on Events and then click "New Live Event" in the upper right corner. 

The next screen that you see is called Create New Event. Make sure under "type", the "quick" button is checked. Next to it you will see Google Hangouts On Air. You will notice that the default setting is private.

4. Click the "Go Live Now" button. Your webcam and microphone will need permission to be used and you will begin your video. You will see several icons on the left side of the screen. Feel free to give those a try. There is a screenshare button that will allow you to video your screen instead of your face if that is what you are trying to achieve.


5. When you are done, just click to stop the broadcast. It will automatically be saved to your YouTube channel privately, meaning no one else can see it. Feel free to use the built-in editing tools in YouTube to finalize your video. 

Are you nervous about venturing into the world of video tools? Don't worry! I'm here to help. You will find that many of your students will find this to be very intuitive and I think you will be pleasantly surprised at the finished products. There are so many ways students can give and receive feedback on their video tools as well. 

Monday, January 9, 2017

FTT - Mailing Lists in Gmail

Creating Email Lists in Gmail

@joe_edtech/@LisaBerghoff

This week's entry is going to be short, but it is an important one for those of us completing the migration from Outlook to Gmail. We all have groups of people we need to email on a regular basis. Rather than typing in lists of email addresses each time, Gmail offers several different ways to create "Groups." Contact Groups are probably the quickest and easiest.

New Contact Group

The easiest way to create a mailing  list is to create a "New Contact Group." This will allow you to simply paste in a list of email addresses and email to the name of a group. For instance, I just created a New Contact Group for the students applying to be Senior Advisors next year.

Start by logging into Gmail. Then click on the word "Mail" in the upper left-hand corner of the screen. Choose "Contacts" from the pop-up list.


If your screen looks like the screenshot below, you are in the "New Contacts Preview." You'll need to exit that first.
On the left-hand side of the screen, click "More" and "Leave the Contacts Preview." Then click "New Group."

You'll be asked to enter a name for the group. Just use a name you'll remember - you'll be able to enter this name later as a "send to" address on an email and message your group. Then click "OK." Click on the name of your new group on the left side of your Contacts page. In this case, I selected "Potential Senior Advisors."
At the top of the page, click the button to add email addresses to your group. It looks like a person with a plus sign next to them.

At this point you can copy and paste a list of emails from an existing message in your inbox or sent messages. Usually, I'll type the names in one time to send an email, then I'll copy the email addresses and paste them into the group.
In the above example, I went to a message in my "Sent Messages," and clicked the button to "Show Details" in the sent messages line. Then I copied all of the email addresses.

Once you've copied the names in, simply click "Add" at the bottom of the text box.


You can now go back to Gmail, and send to the group you've just created. In fact, as you start typing the name of your new group, it should come up as a suggested email address.

By the way, when you select the new group, all of the individual email addresses will automatically populate in the To: line. So, if you want to customize the list (I'm planning a surprise birthday party and don't want to include the guest of honor) it is easy to remove or add names from the list.

Here's a quick video to show you how to create a New Contact Group:


--------------------------------------------------------------------------------------------------------
There are two ways that you can email your classes without creating any lists. If you use Hapara, go to Dashboard and select a class. On the far right of the screen click "Class Info." One of the options you have on that screen is "Email Class."

If you use Google Classroom, you can select the "Student" tab in any class, select all of the students, and click the "Actions" button. One of your choices is Email.


Tuesday, January 3, 2017

FTT - Google Calendar Appointment Slots

Google Calendar Appointment Slots
(Revised for 2017!)

@LisaBerghoff/ @Joe_EdTech


We rang in 2016 with a Free Tech Tools post on Google Calendar. The funny thing is that while we hoped we would move to a Gmail platform at some point in the future, we didn't know that the future would be now! With so many of our colleagues converting over the holidays (digitally, not religiously), we thought it would be worth a repost on this very handy feature in Google Calendar.

Ever been frustrated about trying to schedule time with your students? With finals week just around the corner, many teachers are trying to figure out a way to have students sign up for appointments to present their work, have private feedback meetings, or set goals for next semester. This actually does not have to be complicated because Google Calendar has a feature called appointment slots.  This feature is only available for paid business or education Google accounts and it is very simple to use.  This is the link to the full instructions but here is the quick version:

All you need to do is sign in to your school Google account and open Google calendar.
You want to be looking at "week" or "day" view and then click anywhere on the calendar so that the event box opens up.


At the top of the box, you can click "Appointment slots."  Or, if you click edit event you can add more information.

To invite your students to book appointments with you, just share the link that can be found at the top of the event. You can this via email, Google classroom, post it on your website, or you can even make a QR code that your students can scan.


Here is what it will look like when they open the link:

There are clear instructions on the appointment page to the students explaining how to book and also how to cancel appointments so you won't be bothered with a barrage of emails from students asking to reschedule. On your end, it just looks like one event but you can tell that it's different because there is a grid symbol in the upper left-hand corner. 

If you learn better with video, here is a short lesson on Appointment Slots from Lynda.com:


Are you setting up meetings with students during finals? I'd love to hear what your plan is for that time. Feel free to post in the comments section and share what you are doing. 
Happy scheduling!


Tuesday, December 13, 2016

FTT - Beginner Tips for School Gmail


You've Got Mail!

5 Beginner Tips to Get You Started with Gmail

@LisaBerghoff/@joe_edtech


As we make our way through the transition from Outlook to Gmail, we will continue to provide you with resources, tips and tricks. Many of you are figuring these out on your own and it's exciting to see colleagues sharing their new knowledge with one another. As a reminder, please use the Outlook To Gmail website, created by Ron K. You can find it by clicking this link. I recommend that you bookmark it by clicking on the star located in the URL bar in Chrome. 

Here are 5 Tips To Get You Started...

1. Know How To Get To Your Mail

Gmail is web-based, which means you can access it from any device on the internet. You can get to it by opening a browser tab, preferably in chrome, and click on "mail".
You also have the option to get to it from your apps doc. If you add the gmail app from the chrome store, you can pin it to the taskbar on the bottom of your screen.


2. Set Up Your Signature

This is a great first step because it will help you learn how to go into the settings menu. You just click on the gear in the upper right corner of the mail screen and click settings. Don't be overwhelmed by what you see there. There are many options in gmail and you have plenty of time to explore and check them out, pace yourself! You will notice that you are in the "general" tab of the settings page. Scroll down almost to the bottom of the page and you will see where to add your signature. Yes, you can copy and paste your old Outlook signature in your gmail signature box. After entering your signature, scroll to the bottom and click "save changes"

3. Learn How To Set Vacation Notifications

It's almost vacation time! Make sure you go back into settings by clicking on the gear and click "settings". Stay on the general tab of settings and scroll to the bottom of the screen where you will see "vacation responder".
You can add your vacation message in the box and set the dates for that message to be automatically sent as a reply to your incoming email messages.


4. Get Yourself A Reading Pane and Mini Calendar

This one is very polarizing. People either love the reading pane or they hate it. I'm in the love it category so I was excited to see how easy it is to set it up. Click on the gear and click settings. Then, click the "labs" tab. You can enable or disable these features. Here, you will see the preview pane and the Google calendar gadget. Scroll to the bottom of the screen and click to save your changes. Then, when you go to your gmail inbox, you will click the icon just to the left of the gear and click "vertical split"
This will add your preview pane. You can adjust the size of your preview pane by clicking and dragging the line that separates the pane from the list of messages.


5. Choose A Theme

Is there a specific color that makes you happy? Maybe you have a vacation photo that makes you smile. Set a theme for your gmail by clicking on the gear and clicking "themes". You can choose an existing theme or use one of your own photos. You can adjust the contrast for your text background, blur or darken the edges of your theme. 

These first steps should help get you started in the world of gmail. I know that intially it may feel like trying to cram a square peg in a round hole, but I believe that this is an opportunity for us to work together and learn from one another. It's so interesting to me to learn the different styles and preferences people choose for their email. It also gives me pause and makes me reflect on what it was like to teach without email at all. The fact that we can communicate with each other, our students, parents, and community members at lightning fast speeds still amazes me. We've come a long way!


Have you found some new and favorite features in gmail? Feel free to share below. 

Tuesday, December 6, 2016

FTT - Google Calendar

Getting Started With Google Calendar

@joe_edtech/@LisaBerghoff

Even before I started in District 113, I've had teachers and administrators ask me about the best way to take advantage of digital learning platforms. There are tons of great things to do, but my experience tells me that the biggest game changer is the ability to share live digital calendars with our students. As an adult, I have grown to rely on calendar reminders, emails, and text messages to remind me of important upcoming events. I know that a simple calendar with due dates and test dates would have made me a better student in high school. 

That's why I was always stunned by the fact that we had teachers and staff on one digital platform and our students on another. In order to share calendars with students, we were asking our teachers to live in two different digital worlds. Our switch to Gmail changes all of that and I'm really excited about the possibilities.

There is too much to know about Google Calendars to share everything in one post, but today I want to focus on what I believe are most important things to get started using Google Calendar well: settings, sharing, viewing and hiding calendars, editing events.

Settings:

Every Google App has its own settings so that you can customize it to work the way you'd like:

There are two ways to get to your calendar settings. The first is to click the pull down menu bar from "My calendars" on the left hand side of the screen:

Or, as with every Google App, you can click the settings gear in the upper right hand corner:
The first thing I changed in settings was "Default event duration." In Outlook, the default for a meeting was always 30 minutes. I like to events set at 60 minutes. But you have several different choices. However, the most important part about settings has to do with how you view your calendar. I like to look at it this way:

I want to see the whole week, including Saturday and Sunday, at one time. Notice at the top of Google Calendar, you can choose to look at your calendar by Day, Week, Month, 4 Days, or as an Agenda. However, one of those will be a default view. In other words, every time you open your calendar it will default to...something. I like the Week view. But in settings, you can choose any of them.
You can also set a Custom view for your calendar. If you only want to see a five day calendar, you can make that a Custom view and then set that as your default.

Sharing Your Calendar:

You can change share your calendar with colleagues, spouses, or students by clicking on the pull-down menu bar next to your individual calendar and selecting "Share this Calendar" from the list:

I don't expect everyone to be as open and public as I am, but my calendar is shared with anyone who wants to see it. People who add my calendar can only see when I'm free or busy, and they can't make any changes to my calendar, but anyone can see my calendar. By default, we should share our calendars within District 113 with free/busy times so that admin assistants and department chairs can see your calendars and propose meetings during common free times.

But, you can also choose to share your calendar with individuals. In the example I've included below, I've shared my calendar with several of my colleagues and my personal Gmail account with different permission levels. If someone sets appointments for me, I want them to be able to see all events and be able to edit events.


Viewing Calendars:

In the example calendar I posted above, I can actually see 3 calendars at one time. The first is my normal work calendar, which shows my scheduled school events. The second is my calendar for home, which shows when my daughter's concerts and school events are, when my wife or daughter has something important planned for us to do, and when I need to mentally prepare for family coming to visit (this shared home calendar has prevented many arguments and created some measure of family peace - I highly recommend a shared calendar at home). The third calendar doesn't have many events on it, but it is the most important. It shows when I have tickets to see Rogue One: A Star Wars Story. For easy differentiation, my work events are in grey. My home events are in red. And my Star Wars events are in Orange.

You can hide or view your different calendars by clicking on their titles on the left hand side of your Calendar screen. In the example below, I can see the Joseph Taylor, Birthdays, Brian Verisario, and DHS Library calendars. However, the Free Tech Tools Tuesday calendar is hidden (The color block is white and the text is greyed). 
If I click on the Birthdays, Brian Verisario, and DHS Library calendars, they will be hidden from my overall view. But all I have to do is click them again to make them reapper. If you decide that you want to get rid of a calendar, or if you want to change the default color for a calendar, take your mouse and hover over the particular calendar, then select the pull down menu for the calendar:


From here you can select "Hide this calendar from the list," which means it won't appear on your calendar or in your list of calendars any more. Or, you can simply choose a new color for easy differentiation.

Editing Events:

While you can do an event quick add by simply clicking on the calendar and typing in the name of an event, you can add a ton of information and invite other people to events by clicking the "Edit event" button.

At the top, you can add a title, change the date and/or time, or make the event an "All day" or "Repeating" event. You can also put the event on a different calendar. For instance, I could use the pull down bar next to Calendar to add this to my home calendar instead of my work calendar. You can add a description, add an attachment (especially useful if your are using this with students), color code individual events and add guests. My favorite part about Google Calendar, though, is the fact that you can decide what notifications to add - and how frequently. And I can choose to be notified by email, web browser, or SMS text notification.

By the way, I would love to be able to set the calendar so that all of my students can be notified of major events through SMS text messaging - but I can't. These are individual settings. However, in calendar settings, everyone can set up default notifications. So, you can walk your class through that process or send a short hand out home so that parents know that kids can set up text notifications.

These are just the basics for getting started. There is a lot more information to come, and both schools will be setting up hands on training sessions in the very near future.