Wednesday, March 30, 2022

FTT - The Power of a Camera

The Power Of A Camera: 

Using The Chromebook Camera 

@LisaBerghoff/@MrKimDHS


I was late to the party when it comes to smartphones. I hung on to my LG flip phone for as long as I possibly could. I was perfectly happy being able to make phone calls and fire off a few text messages. As the technology got better, and data and messaging got cheaper, I eventually caved and jumped on the smartphone bandwagon. Immediately I understood the excitement. There were so many apps and so many games that I could engage with and lose track of time! Now that I have had a few iphones I can confidently say that the most underrated tool on this tiny computer is the camera. I use the camera for everything from remembering where I parked my car at the airport to scanning a receipt that I will most certainly lose.

I think we often forget that our students have chromebooks with cameras built in and there are some tools there that are very underutilized. This post will give you just a taste of what your students can do. I would encourage you to encourage them to play around with the camera that is built in and give the tools a test drive. I think that they will find that the camera can be extremely helpful in the classroom. 


How to access the camera on a chromebook:

Click on the app launcher button and then click on the camera app.


When you click on the camera app the camera will be in use.

The chromebook camera allows you to:
  • record still photos
  • record videos
  • record animated gifs which are 5 second clips
  • scan a document and convert it to a pdf
Below are instructions for using the chromebook camera, but first, let's look at some of the settings. 

Within the camera app, you have several settings that you can adjust. Have your students give these a try!
  • Change the size of the grid, length of the timer, or change the camera resolution
  • Select "mirroring" to flip your image from left to right
  • Select "grid" to view a grid overlay to help line up your shots
  • Select timer to turn on a 3 or 10 second timer
  • If you have a second camera, like a document camera, you can click on "switch camera" to change between your external camera and the one that is built in
  • When taking a picture you have the option for landscape (default) or square


Where are my pictures?

The pictures will get saved to the Camera folder on our chromebook. To access the images, open the Files app then select "my files" and then "camera".


How do I edit?

You can open and edit any picture you have taken. Here is a list of the editing tools that are built in. It gives you the basics. There are lots of free online photo editing tools that can be used for more robust editing needs.
  • Crop and rotate the image
  • Rescale the image to resize it
  • Lighting filters to adjust exposure, contrast, and saturation
  • Annotate to draw on top of the image


Recording a video or GIF

  1. Choose "video"
  2. Choose "normal" to record a standard video. You have the ability to pause and resume as you need.
  3. Or choose "GIF" to record a  5 second animated GIF

Scanning a document

  1. Choose "scan" then "document"
  2. Line up the document in the frame and take the picture
  3. Click "retake" if you need to rescan
  4. Click "fix" if you need to adjust the frame
  5. Click "save as photo" or "save as pdf" to save your scanned document

Want more support or help for your students? Let us know. We're happy to help.
You can also give the Chromebook Simulator  a try. 

Monday, March 14, 2022

FTT - Gmail's Newish Look and Integration Updates

 Gmail's New-ish Look and Integration Updates

@LisaBerghoff/@MrKimDHS


Gmail is getting a relatively small update with more rounded corners and focuses on better integration between Google's main communication apps: Gmail, Google Chat, Google Spaces (think Slack, Discord, or even AOL chat rooms), and Google Meet. Essentially you can access the aforementioned apps in a full-screen format without having to create new tabs or switch between them. They began this integration process with Google Calendar and Keep a few years ago now, and has been widely viewed as a good move. 

Try it yourself

You can take a peek at the new interface by going to your settings. Click on "Try out the new Gmail View" and you may be surprised at how little actually changes. As mentioned, corners get rounder and the left bar UI gets a little cleaner. 

Integrations

So first off, heavy users of Google Chat, Meet, and Spaces will enjoy seeing a full-screen UI with their corresponding displays without having to switch tabs. You can toggle through each app by choosing from the left menu. Although the option exists if you'd still prefer chatting in a pop-up window:


Chat notifications are will now appear as bubbles that appear on the bottom left corner of the page. You can respond directly via the bubble, or you can chat via the pop-up window. 

The Bottom Line

These new integerations can be helpful if you utilize the various communication apps in Google. If you haven't jumped into Google Chat or Spaces yet, I highly suggest you give them a try. Here is a previous FTT Blog on Google Chat to assist you. If these changes are not enticing enough, enjoy the bubbles and rounded edges! 


Tuesday, March 8, 2022

FTT - Canva Pro

Creation Multi-Tool

Canva Pro is FREE for Students and Teachers!

@LisaBerghoff/@MrKimDHS


One of my favorite podcasts, How I Built This, recently did an episode with Tim Leatherman in which he described the journey of his leatherman multitool. He was looking for a simple solution to the problem of often needing a variety of tools that he could keep in his pocket. This episode really stuck with me as I am often looking for efficiency of time, effort, and space. The notion that this one little tool could do so many things is very appealing. In addition, the story of perseverance and belief in what he was doing makes Tim Leatherman's story an incredible lesson in entrepreneurship. It took him seven years to sell one Leatherman Tool and his company is now worth over $100 million.

Anyway, I really want to talk to you about Canva. By the way, there's a How I Built This episode about Melanie Perkins, founder of Canva, too! It's from 2019. Canva is the Leatherman Tool of the design world and for teachers and students, the Canva Pro account is FREE!


We have featured Canva before on this blog.  The first post was back in 2015. The features that I wrote about back then still hold true but now Canva has so much more to offer in terms of creativity and design. 


What can you and your students create with Canva?

I talk to so many teachers who are designing lessons where students are creators and not just consumers of information. This is great! Canva is a wonderful tool for this because it is so versatile. You can create everything from infographics and posters to videos, social media posts, mind maps, flashcards, newsletters, and more. The drag and drop system makes it simple to create beautiful designs with a very short learning curve. 


How do you get your free account?

In the near future, you will only be required to sign in with your school Google account. Until then, go to https://www.canva.com/edu-signup/   and enter your information. You can then create a link for your students as well. 


Where should you get started with Canva?

First, think about the goal. What is it you want your students to learn, understand, or be able to do?
Canva will give you suggestions but you can also click the Templates tab at the top of your screen. 
There are thousands of templates to try and there is a search bar so you can find what you need without wasting a ton of time.


No need to stare at a blank screen! This is perfect for students who struggle with getting started. 
When you click Templates, you can browse by subject, or by project type. You will also see trending templates.

Since many of you have probably already used Canva for digital design or print materials. I thought I would use this post to highlight the newer video editing features in Canva. From the home screen where it says What Will You Design you can choose video. From there you will have some easy to assemble video options. These are great for students and will work on any device they are using. There is nothing to download!


You can choose from templates that you will drag and drop and then customize as much as you like.

When you are finished with your video, click the share button. You have so many options for sharing your video creation including getting a sharable link. Also, you can set the permissions just like on Google docs, so you can determine how private or public you want your video to be. If you want to embed, you can get the html code and add it to your website or blog page. 
Here is an example:


What will you create with Canva Pro?


Monday, February 28, 2022

FTT - Another Look at Socrative

photo credit: albertogp123 via photopin cc
Technology Enhanced Formative Assessment with Socrative

@JoeTaylorDHS

Full disclosure - some of this content is a repeat of a blog post I wrote in 2014. I thought it was worth revisiting.

Technology Enhanced Formative Assessment is a topic that is much bigger than this relatively short blog post. However, virtually every successful 1:1 teacher I've worked with says the same thing. The ability to use the technology to weave formative assessment into the classroom frequently and relatively seamlessly helps lead to increased student achievement.

Scholars Ian Beatty and William Gerace (2009) believe so strongly in the research behind technology-enhanced formative assessment that they built their entire pedagogy on it (click here for the full article). They wrote that the classroom should not only be student-based, but also assessment based, and that formative assessment should be used to:
  1. Motivate and focus student learning with question-driven instruction.
  2. Develop students’ understanding and fluency with conversational discourse.
  3. Inform and adjust teaching and learning decisions.
  4. Help students develop metacognitive skills (see full citation below).
There are actually lots of different tech tools to help you embed formative assessment into your classroom, but one of my favorites is called Socrative. Socrative is a free, online, classroom response system that can help you accomplish the goals outlined by Beatty and Gerace above. While you can use Socrative for asynchronous work at home (like Google Forms), or embed it within a presentation that you are making in class (like Pear Deck), I like to use it as a stand-alone tool so that an entire lesson is centered around questions and responses. 

I loved to use Socrative in a conference session I used to lead on the "Fair Use" exception to the Copyright law in the US. If you just yawned, you weren't alone. Rather than droning on about the nuances of the law, I created some fairly simple, but open to interpretation, real-life dilemmas faced by schools on a regular basis and used them to drive discussion. Here's an example:


Of course, the answer to the question is, it depends on the scenario. But it led to some great discussions both in and between our groups, and was more interesting than listening to me doing my impression of the history teacher in "Ferris Bueller's Day Off."

To get started, go to Socrative.com and create your free account, you have several options for interacting with your students:


You can create a quiz in advance, and lead your class through it as graphical displays of responses appear on the screen, or you can put the students in groups and have them work at their own pace. You can also create questions on the spot or use the "Space Race" (students square off against one another in teams) to add a competitive gaming element to the classroom. At the end of the activity, you can get a report of how each student did on the quiz.

Here's a really short intro video (Socrative in 90 Seconds):


But for a deeper dive, here is a detailed video from Socrative:


*And if you are interested, my go-to expert on Copyright and Fair Use is Renee Hobbs and the Media Education Lab. If the topic interests you, please explore The Code of Best Practices in Fair Use for Media Literacy Education.

-------------------------------------------------------------------------
Reference:
Beatty, I. D., & Gerace, W. J. (2009). Technology-Enhanced Formative Assessment: A Research-Based Pedagogy for Teaching Science with Classroom Response Technology. Journal Of Science Education And Technology, 18(2), 146-162.


Monday, February 14, 2022

FTT - What's New in Google?

  • What's New In Google?

@LisaBerghoff/@MrKimDHS


One of the things that I appreciate most about Google is that they are constantly reinventing and improving their products. There are some recent updates that I have been dreaming about for a while and I'm so excited to share them with you. Some of these updates are new-ish but you might not be aware of them. Here we go!

1. Add a watermark to your docs.

It's just a draft! It's confidential! Whatever it may be, it can be helpful to add it as a watermark so it is super obvious. You can now add text or an image as a watermark in Google docs. You can adjust the transparency of the watermark as well as choose horizontal or diagonal orientation. 

  • Click on Insert and then choose Watermark
  • From the side panel, type in your text or select your image
  • Make any adjustments that you need: transparency, orientation, font, etc.
  • To remove the watermark, go back to Insert and choose Watermark and click remove

2. Review And Approval In Docs

Need to make sure the right eyes are on your docs? You can now use this approval system for docs, sheets, and slides. 

  • Click File and choose Approvals
  • Enter your list of approvers, add a custom message, and optional due date. The people you list here will receive an email notification with a link to the document. When edits are made, all reviewers are notified and the latest version is reapproved.
  • A document is considered approved when everyone signs off. At that point, the file locks and cannot be edited. 
3. Activity Dashboard: See who has viewed your docs.
Sometimes it can be frustrating if you share a link to a doc for others simply to view but you have no idea if they have even clicked on the link. The activity dashboard can show you how others have interacted with your document. It can also help you keep better track of changes that have been made, how the document has been shared, and the trend for comments.

  • Click Tools and then Activity Dashboard. You can also click the icon with the bent arrow in the upper right corner. 
  • From here, the dashboard will appear and you can click to see your data
4.  Quickly Create Meeting Notes In Docs From Calendar

Meeting notes is one of the most common uses of Google docs. Now, you can use the shortcut for meeting notes that is found in calendar.
  • From your Google calendar, click on an event and click edit to view the event details
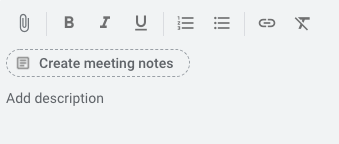
  • Click Create Meeting Notes and a new Google doc will automatically be created and attached to the calendar. It will be shared with all event guests if it is created prior to the meeting.
  • The notes document will automatically have the date, the title of your meeting, list of attendees, as well as space for notes and action items. 
What new Google features are you dreaming about? Have you tried any of these new features yet?
Want some help?
Let us know!


FTT - Parent/Guardian Guide to Schoology

 Parent/Guardian Guide to Schoology 


@LisaBerghoff/@MrKimDHS

In an ideal world there is a perfect level of synergy in the dance between students, their parents/guardians, and the teachers. While staff don't necessarily want to receive an email within minutes of a posted grade, we certainly don't want parents being completely out of the loop. There must be a happy medium. With the help of technology we can at the very least bring everyone to the table and help parents/guardians feel more engaged and helpful in regards to student academic struggles and successes. Here is a quick rehash on how to get your parents/guardians active on Schoology. 

Schoology Parent Access Guide

You can direct your parents/guardians to this helpful Google Doc with clear instructions on how to get started with Schoology. While we're halfway through the year, it is never too late to get parents and guardians onboarded.

Parent/Guardian Email Notifications (The Digest)

It may also be helpful to note that parents and guardians must individually sign up to receive weekly (or daily) email notifications about their students' grades. It shows up in the form of a Parent Email Digest and you have full control of the timing. You can also request an "Overdue Submissions Email." Much as it sounds, parents and guardians could receive a notification whenever an assignment submission has been marked as missing.
  • Click on the name on the top right-hand corner
  • Click on "Settings," and then "Notifications."


From everything I've experienced, it certainly takes a village to take care of your children. While I can fill entire libraries of things I still haven't figured out about parenting, what I have learned is that clear communication is key. Let's part the veil a little bit, at least with Schoology. If you have any other strategies on working together with parents and guardians, let us know!

Monday, January 31, 2022

FTT - Most Frequently Asked Questions 2021 Verion

"2021's Most Frequently Asked Questions


@LisaBerghoff/@MrKimDHS 

In an effort to take full advantage of economies of scale, here is an expanded list of the most frequently asked questions of 2021, or at least what I can think of at the moment:

District Licenses

Here is the current list of district licenses. You can access the majority of them by going to our Staff Resources page and logging in via Google SSO (Okta). Your miles may vary between school licensing. Click on each product for some resources to get started, or click here for a general description of all of them.


Dropped/Xfered Student Grades

Did a student just transfer out of your class into someone else's gradebook, and is the receiving teacher requesting their current point totals or cumulative score? 

  • Click on the "Members" tab on the left side of Schoology and then venture over to "Inactive."
  • Then click on the bar graph next to their name and save the page as a PDF ready for delivery!

Adding Section-Level Roles in Schoology

If you need to add senior teachers or a colleague to your Schoology course, here's the process:
  • Click on "members" on the left side of Schoology, and then add members. 
  • Click on the icon to the right of their name and make them an admin. You need to make them admin so that the nightly IC Sync doesn't remove them.
  • Then click on the icon again and click, "Set Section-level Role"
  • Choose "no grades, view materials" if it's a student.


Cross-Link Requests

Because of the way Infinite Campus categorizes and organizes classes, sometimes you'll be given multiple Schoology course sections for a singular period. To get past this, you can request a Cross-Linking at the start of each semester. To do this, you should take a look at your schedule first on IC:

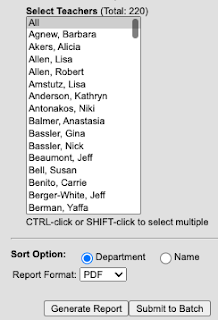
  • Switch over to "Campus Tools" and click on the following: Scheduling -> Reports -> Teacher Schedule Batch. Find your name and click "Generate Report."


  • Once you find your sections, you'll have to designate a "Target Course" and your "Linked Courses." In the example below, "850022-47 LEARNING STRATEGIES" would be the "Target Course" that absorbs the remaining sections as "Linked Courses."


Do you have a question that wasn't shown above? Ask below!