Friday, May 6, 2022

FTT - Skills for the Future!


Skills For The Future

@LisaBerghoff/@MrKimDHS


As we get ready to send the class of 2022 on their way, it seems like an appropriate time  to take a look at the skills that will be needed by our students in the not so distant future. The World Economic Forum's future of jobs report  indicates the top ten skills of 2025. They are divided into four categories: Problem-Solving, Self-Management, Working With People, and Technology Use And Development.  Here is the full list, color coded by category. 


 Fortunately for us, we have the ability to craft learning experiences for our students that will enable them to hone these skills.  As you can see, five of the ten skills involve problem-solving, which can easily apply to any content area. 


Now, here is a list of five tools/activities that you are probably already familiar with,that you can utilize in your classroom to maximize these skills.

Breakout Edu: This is a popular activity because it is so much fun. It's also really challenging and can be brought into any class. We own several breakout edu physical boxes and locks but you can also do this entirely digitally. Yes, you can make your own breakout games but there are also many many open source breakout edu games that you can grab and make your own.

Schoology: Varying Assessment Types Did you know that there are 18 different types of questions that you can create in Schoology assessments? Go beyond multiple choice and rote memorization and get into more reasoning, critical thinking and analysis by using these different options. You can ask students to manipulate graphs,  generate video responses, interact with images, and more. 

Canva To Synthesize and Create: You can ask students to answer questions or you can ask students to create an infographic explaining their understanding; which would be more engaging and memorable? Tap into students' creativity by having them create a video. In case you missed the announcement, our district now has a Canva Pro account! Just sign in with your school Google credentials. 

Pear Deck: Go beyond students watching slides presentations and have them interact with Pear Deck interactive questions but also leverage the ability to embed websites into Pear Deck and ask students to think critically about what they notice. Remember that Pear Deck now has a reflect and review feature which allows you to give feedback to students. Also, if you have not tried flashcard factory I highly recommend it! 

Schoology: Discussion Questions: Have students interact with one another outside of class by creating discussion questions. This helps ensure that every student participates and it also helps keep students engaged when they are not physically in class. This is a very real and practical way for our students to interact and you can provide opportunities for them to practice doing this beyond social media.

Did any of your favorites not make this list? Let us know what you use for maximum engagement and problem-solving. 


Monday, April 25, 2022

FTT - Hapara and Guided Browsing

 Hapara and Guided Browsing


@LisaBerghoff/@MrKimDHS

Why Hapara?

Hapara is an instructional management system with a variety of differentiated tools available to help manage a digital classroom. Oh wait, another management system? Learning management and classroom management and now an instructional one? Don't worry, you don't necessarily have to keep up with all of the emerging vernacular but concretely, there are some interesting tools within Hapara to take advantage of.

While some Hapara tools have become redundant through our use of Schoology, we can utilize Hapara for one of its, big brotherish, features: Guided Browsing for assessment security and student management.

Guided Browsing 

Let's all face it, LockDown Browser is often more of a headache than it's worth. While we have written about LDB in the past, current issues have made it untenable for continued use. So what are our alternatives for secure, digital testing? Hapara's Guided Browsing allows staff to curate and supervise student usage of their Chromebook for specified periods of time. It can be a reliable alternative to LockDown Browser (Students MUST use their school-issued Chromebooks). So how does it work?

  1. Log in to https://app.hapara.com/login with your district Google account.
  2. Choose your course.
  3. Click on "Highlights" and then "Guided Browsing"


  4. To begin guided browsing, you'll need to decide what type of guided browsing you want to use. They are called, "focus" and "filter" sessions. Colloquially known as "white-listing" or "black-listing" site.
    1. A Focus Session (White-listing) only allows students to access specific sites that you have deemed relevant to their task. So if you "white-list" lms.dist113.org, students will ONLY be able to access that site. You can choose up to 10 sites to "white-list."
    2. A Filter Session (Black-listing) lets students use any site they want, except for the ones that have been marked. So if you "black-list" YouTube.com, students will not be able to access it.

  5. For a testing scenario, you will most likely choose a Focus Session. You can "white-list" our schoology domain, or more specfiically the exact URL of your online assessment. You will then be asked to decide certain conditions and parameters for the guided browsing session:

You can set time limits, schedule sessions, assign to specific students or the whole class, and best of all you can save it as a template for continued use. For best results, in addition to the digital limitations imposed by Hapara, it is always a good idea to be physically present during a session. This should not be given remotely. 

While it's not an ideal situation to have to monitor student work during an assessment, let's face it...our looming paper shortage may force us to be creative in the way we assess our students. There are a variety of successful summative experiences that we can choose from, but if for now a traditional Schoology assessment fits your needs, Hapara can help. Let us know how we can help!

Tuesday, April 19, 2022

FTT - Take a Virtual Field Trip

Take A Virtual Field Trip

Google Arts And Culture

@LisaBerghoff/@MrKimDHS 

Google Arts And Culture Logo
                                          image credit: Google

It's spring! When I was a kid, spring meant it was field trip season. I'm sure there was some logical reason for it, or maybe not, but all of our field trips were in the spring. Maybe the teachers were just so done being in the classrooms with us that they had to get us out! Even all of these years later, and even though I have taken field trips at many points during the year (not this year!) I still think of spring as field trip time. This is also the time where it is simultaneously the race to the finish AND the wishing we could slow time so we can fit it all in. Sometimes we can offer our students amazing experiences without leaving school.

Google Arts And Culture is a free online platform that provides users with access to works of art, historical collections, and culture. It is a non-profit initiative that works with cultural institutions and artists around the world with the mission of preserving the world's art and culture online making it accessible to anyone, anywhere. 

Obviously, digitized art is not the same as being there in person. Have any of you seen the real Mona Lisa? It's tiny! However, this can be an incredible supplement and it allows educators to provide students with some context, image, or idea that you want them to learn about. 

How Does It Work?
Google Arts And Culture can be experienced on a web browser but there are also free mobile apps for both iOS and Adroid. There are several ways to experience and explore what is there. When you click the explore tab, you can browse by artist or historical event. There are also themes, categories, and the ability to explore by time and color. Of course, it is created by Google and you can also enter search terms.


There is also an impressive list of collections. These are works of art from prominent museums all over the world. There is also a collection of images from NASA. Within the collections there are "stories" which are online exhibits. These have more than just images. These are curated groups of images along with information that gives the feel of walking through an exhibit. 

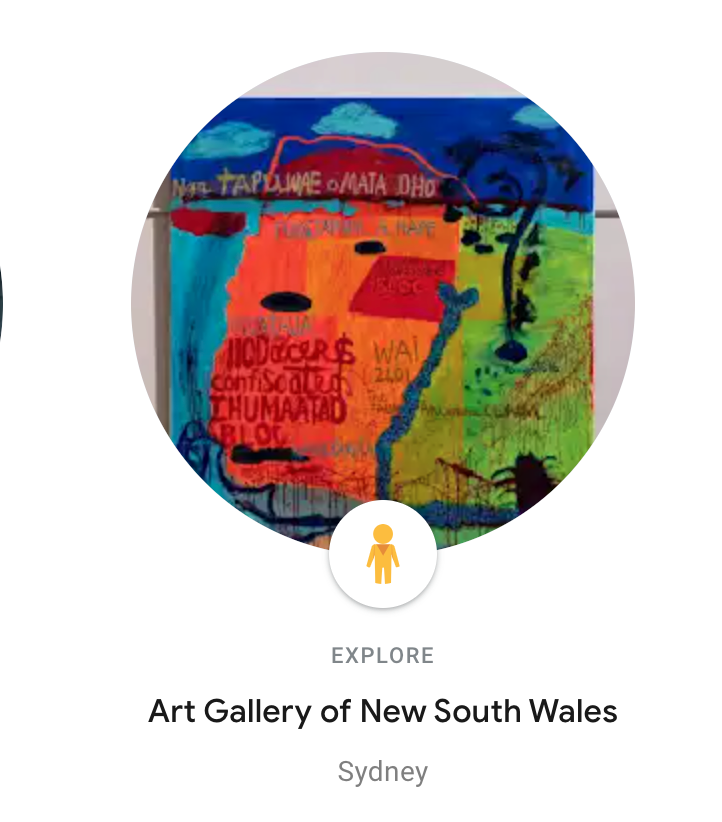
There are also virtual tours called "Museum Explorer".  These are online opportunities to choose your own adventure as you move through a gallery. I have never been to Sydney, but I was able to explore the Art Gallery of New South Wales. It starts from outside the museum and takes you through as you would if you were actually there. I even went up the escalator! You can then navigate by clicking on the arrows to determine where in the museum you will go. These are 360 degree images so it does give the feel of being there. 


How Can I Use This With Students?
  • Aside from the obvious, you can start by using the Favorites tab so you can share specific collections you would like students to explore. Of course, everything has a link that you can easily add to Schoology for easy access. 
  •  Instead of giving them the entire internet for research, you can direct them to specific cultural locations that are reputable and full of engaging images. 
  • Tired of looking at Google slides? Have students learn about a collection and then they can be the docent who takes the class through a museum exhibit and teaches the class. The exhibits are easy to navigate and can be projected.
  • Looking for more than images? There are 360 videos too! check out this one on how to go to the bathroom in space. 
  • Games! Since we already know our students are using their devices to play, why not introduce them to some games that spark creativity and encourage curiosity? The Google Arts And Culture games page has everything from visual crosswords to coloring books to sound exploration. 
I went down a rabbit hole playing a game called Which Came First? It was pretty fun and I think our students would love it. 


It It Worth Looking For 15 Minutes?

I do think it's worth taking a look. All content areas can find connections with the artifacts that are held here. Also, this is not something that takes a lot of time to prepare. If you are looking for a little field trip feeling this spring, check out Google Arts And Culture.

Want some help? Let us know.
Do you already use Google Arts And Culture? We would love to hear about it. 


Monday, April 4, 2022

FTT - ADA Accessibility


Accessibility For All

@LisaBerghoff/@MrKimDHS

Context

Even before the pandemic, we were seeing a steady rise in the amount of educational content and communications becoming digitized and accessible online. Remote learning made online access a necessity which may have exposed some of the weaknesses and holes in how we were uploading our content. As a response, the powers that be signed HB26 last August which quote, "content available on any third party online curriculum that is made available to enrolled students or the public by a school district through the Internet is readily accessible to persons with disabilities." What this means for us is that merely uploading a scanned copy of a PDF online may not be best practice anymore. To ensure equitable access to all members of our community, there are some simple ways to improve the "accessibility score" of any document you upload. So here are a few different considerations when creating online content for not only your students with disabilities but for all of your students.

Screen Readers, Text-to-Speech, and more

Screen readers like Google Read and Write are digital tools students with disabilities can utilize to access information online. In order to make it easier (or even possible) for these screen readers to work, most of us have worked hard to convert our PDFs through a process called OCR or Optical Character Recognition. There are some simple, automatic ways of going through this conversion. Instead of feeding it through expensive OCR machines, cloud storage (mainly Google Drive) can automatically convert text for us. But there are still limitations that OCR, and we can be more specific and conscientious of the content we distribute.

Most Common Accessibility Issues

Here are a few simple ways to make your PDFs more accessible:
  • Adding a title 
    • This isn't merely naming the file of your PDF. It's establishing an inherent title to the document itself. So if we were using a screen reader, the screen reader could quickly identify the file making it easier to navigate tabs and understand the purpose of PDFs.
  • Establishing a language
    • While you may think, "well it's typed in English...clearly the language is English...." documents do not explicitly state the language in which they have been created. Screen readers can gain a logistical advantage with a set language for punctuation, pronunciation, and more. 
  • Tagging your text
    • Sometimes the reading order of text boxes isn't essentially set by the PDF. Which text box makes the most sense to start with? Or to end with? Is there an order that would help the reader understand the information present? It won't always be top to bottom. Tagging your text gives screen readers a set map to follow while reading.
  • Alternative Text for Images
    • The accessibility gap for visually impaired students regarding images almost goes without saying, but I saw firsthand how difficult it makes students' lives during an AP Government test. The visually impaired student was asked to extrapolate data and information based off of maps, political cartoons, and graphs on a variety of AP questions. Luckily, each image had something called "Alternative Text," which is simply a descriptive paragraph that explains to the reader what exactly the image is attempting to represent. 

Difficult, but doable

  • Data Tables and Graphs
    • I was amazed and humbled by the lengths at which students with visual impairments had to go to access data on simple graphs and tables. The way they were able to listen to complex information, visualize it internally, and make any sense of the data was astounding. We truly take for granted how easily able-bodied students can extract meaning from data every time they look at an Excel Sheet or simple pie graph. 
    • Screen readers can do their best, but we all know reading figures left to right might work for a simple paragraph, but won't necessarily be the correct way to read a data table. When creating content for the visually impaired, it will be up to educators to imagine how to verbalize the data so that it makes sense from their viewpoint. This type of introspection will yield positive dividends not just all of your students, but for the educator as well. 

Conclusion

So you may be thinking, well that's all great but where are the concrete steps to tagging your text, or establishing a language? How do you do that? That information is coming. It depends not only on your productive tool (Word or Adobe PDF), but it also depends on your operating system (macOS, Windows). Those guides are coming with as much specificity and clarity as possible. But to start, we can all benefit from being a little bit more conscientious and attentive and thoughtful of more than just the academic prowess of what we're giving out, but also the manner in which we do. 

Wednesday, March 30, 2022

FTT - The Power of a Camera

The Power Of A Camera: 

Using The Chromebook Camera 

@LisaBerghoff/@MrKimDHS


I was late to the party when it comes to smartphones. I hung on to my LG flip phone for as long as I possibly could. I was perfectly happy being able to make phone calls and fire off a few text messages. As the technology got better, and data and messaging got cheaper, I eventually caved and jumped on the smartphone bandwagon. Immediately I understood the excitement. There were so many apps and so many games that I could engage with and lose track of time! Now that I have had a few iphones I can confidently say that the most underrated tool on this tiny computer is the camera. I use the camera for everything from remembering where I parked my car at the airport to scanning a receipt that I will most certainly lose.

I think we often forget that our students have chromebooks with cameras built in and there are some tools there that are very underutilized. This post will give you just a taste of what your students can do. I would encourage you to encourage them to play around with the camera that is built in and give the tools a test drive. I think that they will find that the camera can be extremely helpful in the classroom. 


How to access the camera on a chromebook:

Click on the app launcher button and then click on the camera app.


When you click on the camera app the camera will be in use.

The chromebook camera allows you to:
  • record still photos
  • record videos
  • record animated gifs which are 5 second clips
  • scan a document and convert it to a pdf
Below are instructions for using the chromebook camera, but first, let's look at some of the settings. 

Within the camera app, you have several settings that you can adjust. Have your students give these a try!
  • Change the size of the grid, length of the timer, or change the camera resolution
  • Select "mirroring" to flip your image from left to right
  • Select "grid" to view a grid overlay to help line up your shots
  • Select timer to turn on a 3 or 10 second timer
  • If you have a second camera, like a document camera, you can click on "switch camera" to change between your external camera and the one that is built in
  • When taking a picture you have the option for landscape (default) or square


Where are my pictures?

The pictures will get saved to the Camera folder on our chromebook. To access the images, open the Files app then select "my files" and then "camera".


How do I edit?

You can open and edit any picture you have taken. Here is a list of the editing tools that are built in. It gives you the basics. There are lots of free online photo editing tools that can be used for more robust editing needs.
  • Crop and rotate the image
  • Rescale the image to resize it
  • Lighting filters to adjust exposure, contrast, and saturation
  • Annotate to draw on top of the image


Recording a video or GIF

  1. Choose "video"
  2. Choose "normal" to record a standard video. You have the ability to pause and resume as you need.
  3. Or choose "GIF" to record a  5 second animated GIF

Scanning a document

  1. Choose "scan" then "document"
  2. Line up the document in the frame and take the picture
  3. Click "retake" if you need to rescan
  4. Click "fix" if you need to adjust the frame
  5. Click "save as photo" or "save as pdf" to save your scanned document

Want more support or help for your students? Let us know. We're happy to help.
You can also give the Chromebook Simulator  a try. 

Monday, March 14, 2022

FTT - Gmail's Newish Look and Integration Updates

 Gmail's New-ish Look and Integration Updates

@LisaBerghoff/@MrKimDHS


Gmail is getting a relatively small update with more rounded corners and focuses on better integration between Google's main communication apps: Gmail, Google Chat, Google Spaces (think Slack, Discord, or even AOL chat rooms), and Google Meet. Essentially you can access the aforementioned apps in a full-screen format without having to create new tabs or switch between them. They began this integration process with Google Calendar and Keep a few years ago now, and has been widely viewed as a good move. 

Try it yourself

You can take a peek at the new interface by going to your settings. Click on "Try out the new Gmail View" and you may be surprised at how little actually changes. As mentioned, corners get rounder and the left bar UI gets a little cleaner. 

Integrations

So first off, heavy users of Google Chat, Meet, and Spaces will enjoy seeing a full-screen UI with their corresponding displays without having to switch tabs. You can toggle through each app by choosing from the left menu. Although the option exists if you'd still prefer chatting in a pop-up window:


Chat notifications are will now appear as bubbles that appear on the bottom left corner of the page. You can respond directly via the bubble, or you can chat via the pop-up window. 

The Bottom Line

These new integerations can be helpful if you utilize the various communication apps in Google. If you haven't jumped into Google Chat or Spaces yet, I highly suggest you give them a try. Here is a previous FTT Blog on Google Chat to assist you. If these changes are not enticing enough, enjoy the bubbles and rounded edges! 


Tuesday, March 8, 2022

FTT - Canva Pro

Creation Multi-Tool

Canva Pro is FREE for Students and Teachers!

@LisaBerghoff/@MrKimDHS


One of my favorite podcasts, How I Built This, recently did an episode with Tim Leatherman in which he described the journey of his leatherman multitool. He was looking for a simple solution to the problem of often needing a variety of tools that he could keep in his pocket. This episode really stuck with me as I am often looking for efficiency of time, effort, and space. The notion that this one little tool could do so many things is very appealing. In addition, the story of perseverance and belief in what he was doing makes Tim Leatherman's story an incredible lesson in entrepreneurship. It took him seven years to sell one Leatherman Tool and his company is now worth over $100 million.

Anyway, I really want to talk to you about Canva. By the way, there's a How I Built This episode about Melanie Perkins, founder of Canva, too! It's from 2019. Canva is the Leatherman Tool of the design world and for teachers and students, the Canva Pro account is FREE!


We have featured Canva before on this blog.  The first post was back in 2015. The features that I wrote about back then still hold true but now Canva has so much more to offer in terms of creativity and design. 


What can you and your students create with Canva?

I talk to so many teachers who are designing lessons where students are creators and not just consumers of information. This is great! Canva is a wonderful tool for this because it is so versatile. You can create everything from infographics and posters to videos, social media posts, mind maps, flashcards, newsletters, and more. The drag and drop system makes it simple to create beautiful designs with a very short learning curve. 


How do you get your free account?

In the near future, you will only be required to sign in with your school Google account. Until then, go to https://www.canva.com/edu-signup/   and enter your information. You can then create a link for your students as well. 


Where should you get started with Canva?

First, think about the goal. What is it you want your students to learn, understand, or be able to do?
Canva will give you suggestions but you can also click the Templates tab at the top of your screen. 
There are thousands of templates to try and there is a search bar so you can find what you need without wasting a ton of time.


No need to stare at a blank screen! This is perfect for students who struggle with getting started. 
When you click Templates, you can browse by subject, or by project type. You will also see trending templates.

Since many of you have probably already used Canva for digital design or print materials. I thought I would use this post to highlight the newer video editing features in Canva. From the home screen where it says What Will You Design you can choose video. From there you will have some easy to assemble video options. These are great for students and will work on any device they are using. There is nothing to download!


You can choose from templates that you will drag and drop and then customize as much as you like.

When you are finished with your video, click the share button. You have so many options for sharing your video creation including getting a sharable link. Also, you can set the permissions just like on Google docs, so you can determine how private or public you want your video to be. If you want to embed, you can get the html code and add it to your website or blog page. 
Here is an example:


What will you create with Canva Pro?