Wednesday, March 20, 2019

FTT - Turnitin and Schoology 2.0

Turnitin and Schoology 2.0

@LisaBerghoff @Themrkim


So what's new for our favorite originality checker within Schoology? A new look at how to create and assign Turnitin assignments that's actually been there the whole time. While the standard instructions ask users to create a Turnitin assignment as a standalone external tool, some creative users have been incorporating it into a Schoology assignment with all of the perks of using an assignment. 

OK so what does that mean? Most teachers have been used to creating assignments by adding an "External Tool" through the "Add Materials" option below

While this option is still viable and can be a simple way of creating a Turnitin assignment, there are a few weaknesses:
  • External Tools cannot be graded as a final exam
  • You can't change the grading factor. 
Alternatively, you CAN set a Turnitin assignment as a final exam, and you CAN change the grading factory by creating an assignment through Schoology and merely attaching Turnitin as an External Tool. 

  • First go to "Add Materials" and click on "Assignments"
  • Build your assignment like any other by giving it a name, description, and even a link.
  • Click on the External Tool icon under Description.
  • This window should look familiar. Change the "Tool Provider" from "Automatic, based on URL" to "Turnitin"


  • Now you should be able to weigh it as a final, and change the factor by clicking on "Grading options"


  • In order to finalize the process, click on the assignment you created to manage the Turnitin settings.


This new option of creating Turnitin assignments on Schoology will give us more flexibility when it comes to assigning and assessing papers and projects. Questions? Feel free to contact us!


Tuesday, March 5, 2019

FTT - Make Materials More Accessible!

Make Materials More Accessible!

@LisaBerghoff


I have recently discovered that I really enjoy doing jigsaw puzzles. There is something about taking all of those little tiny pieces and making them fit together to form a picture that I just love. I recently completed a puzzle that was missing 3 pieces. It was so frustrating and made completing the puzzle a lot less satisfying. I could still see the picture and I knew that I put in the same amount of time and effort, it's not like those last few pieces would have taken long to put in, but I felt like I was not getting the full experience and the picture never really looked right with those holes. 

It must feel similarly for our students who, for a variety of reasons, need text read aloud to them but the text is not in a form that makes it easy for them to use the tools necessary to make that happen. We have students who are fully capable of doing the work, but there are many steps that get in the way before they can even consider sitting down to complete the task.

The good news is, we have the capability to make things just a little bit easier for them!

First of all, our copy machines in the copy rooms of our schools have  Optical Character Recognition (also called OCR) capabilities that allow a teacher to scan a document and make it accessible, meaning that it can be read to the student using text to speech by Read&Write.

Read&Write might sound familiar to you because it has been highlighted in a previous blog post and many of our students use it. 

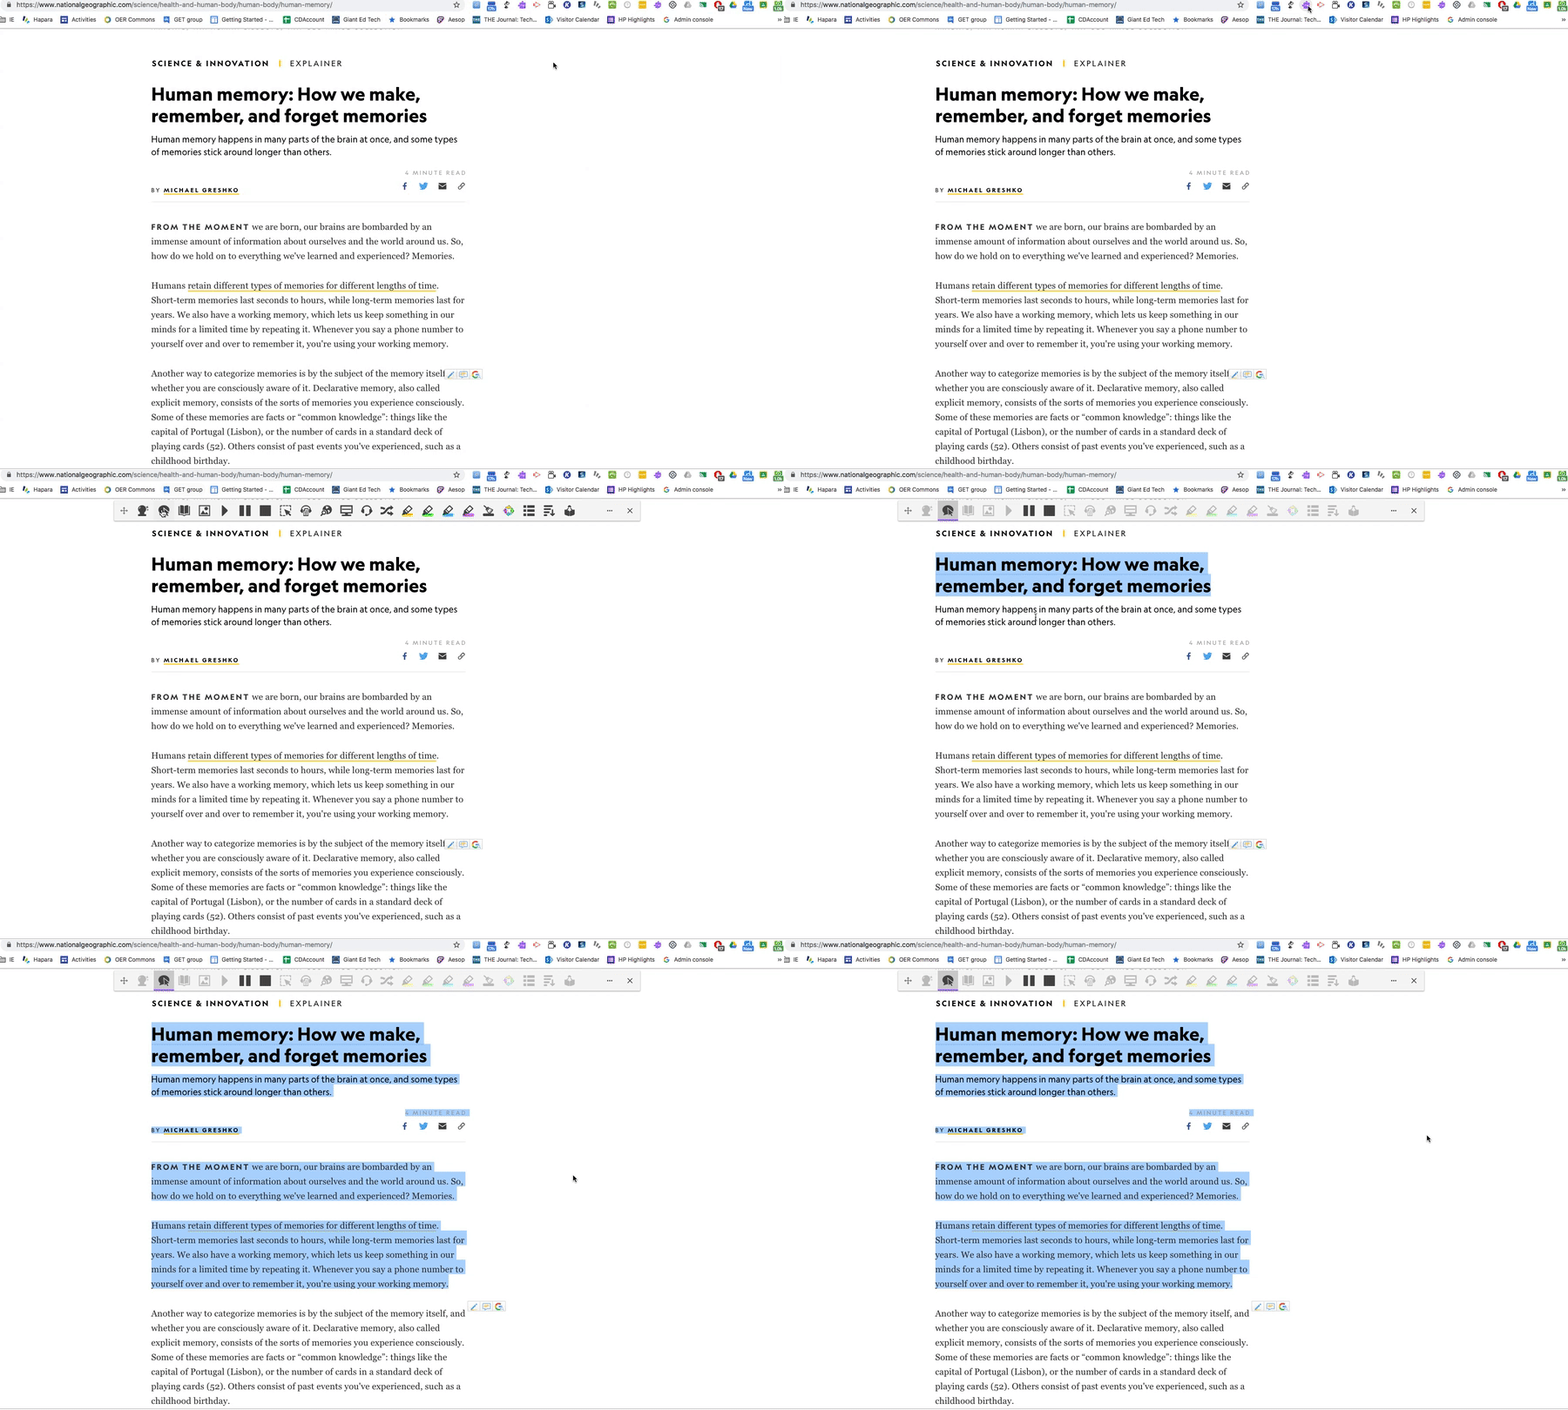
Read&Write for Google Chrome is an extension. That means is works while you are working online and can help make things better for you while you are working in Google docs, looking at a website like National Geographic, or reading an article online. It shows up as a little purple puzzle piece next to the box where the website url can be found. (fun fact, that's called the omnibox!) If you want to use it, you just click the little puzzle piece and the tool opens up for you.   The free version offers text to speech, hover speech, pdf reader, single word translator, and the ability to practice reading aloud. Along with supports in French, Portuguese, Spanish, and Dutch. 

There is a free 30 day trial for students and teachers can get the paid version for free forever!  We do have a limited number of licenses for students who have a diagnosed need for this support.  The paid version has extensive (over 80) tools that help with both reading and writing. I highly encourage you to check it out. Just go to: texthelp.com/en-gb/products/read-write/free-for-teachers/ after installing the extension from the Chrome web store.


Image from Gyazo


The beauty of Read&Write is that THE KIDS CAN DO IT THEMSELVES!

(yes, I'm actually yelling)


But wait, didn't you remember hearing something about our copy machines?


Here is where you come in. One of the barriers to students using this tool is that when text is scanned, it doesn't always have OCR capabilities turned on. Basically, this means that the computer just interprets the scan as an image and not as text. But you can choose the OCR option instead of "standard" for scanning and this helps fill in the pieces for our students. That's it. It is that simple. You can remove a huge barrier by pressing one button. Scanning your paper materials helps make everything more accessible for your students who struggle, and may even be helpful for those who don't. If you were showing a video in class and there was a glare for some students, you would turn out the lights so it would be easier to see, right?

Help your students get the whole picture without missing pieces.
Want some help getting started? Feel free to contact me.


Monday, December 17, 2018

FTT - uBlock Origin

Decommercializing the Web for the Classroom (and Maybe Home, Too)

@joe_edtech/@LisaBerghoff

Today's FTT is a throwback to my first contribution to this blog as a guest contributor in 2016. How things have changed! 

I had always considered myself to be a price-savvy, prudent consumer who wasn't susceptible to the same greasy advertisement schemes, ploys, and tactics that suckered the rest of society.

And then I began shopping for an engagement ring.

One of the best and worst parts of planning a proposal is the immense pressure of creating that perfect moment of astonishment and surprise.The mental gymnastics involved in somehow discretely acquiring a person's ring size, or moving the little ring box from its original hiding place in the bathroom closet, into a much safer, much smellier left tennis shoe in the middle of the night, speaks volumes of the necessity for discretion.

You could then imagine my horror when after a few nights of researching engagement rings online, my browsers were now full of engagement ring related ads and pop-ups basically screaming at my girlfriend that things were about to get real.

Now if you've done any amount of online shopping, you will either find it creepy or helpful that firms will often keep tabs on your search history to populate relevant ads on your websites. Led by internet giants like Google and Facebook, ads have become more and more sophisticated and pronounced.

IMBD Site WITH Ads
This is where a neat, light-weight Chrome Extension called uBlock Origin comes in. uBlock Origin will filter and block the majority of ads that you see and experience on the web. Without going too deep into the ethics of ad blocking, it is safe to say that ads are detrimental to the classroom environment.

IMBD Site WITHOUT Ads - uBlock Origin
Ever try to show a YouTube video in class that was preceded by an inappropriate, awkward, and unskippable commercial? Or see a popular website taken over by large, obnoxious advertisements? uBlock Origin can help.

Perks of uBlock Origin:

  • Websites will load faster
  • Mobile users won't have to waste data on bandwidth-hogging commercials or advertisements. 
  • Filters advertisements that contain viruses, malware, and phishing messages.
  • Block all ads on YouTube


Once installed, users will not have to do anything to enjoy the benefits of uBlock Origin. It's a simple plug-and-play extension that works so well that at times I forget it’s even installed!

Now there are a few things to consider once the extension is installed. Some websites have caught on to ad-blocking, and will not allow users access to their sites until the ad-block is disabled. Users can simply pause uBlock Origin by clicking on the giant power button on the menu on the top right corner of your browser.


Are ads disrupting your online educational experience? Feel free to post comments below!
--------------------------------------------------------------------------------------------------------
Gotta free tech tool you'd like to share? Contact Lisa or Joe to be a guest blogger!


Tuesday, December 11, 2018

FTT - TedEd: Lessons Worth Sharing

TedEd: Lessons Worth Sharing


@LisaBerghoff/@MrKimDHS

Can you remember the first Ted Talk you ever heard? I can and it's still one of my all time favorites. It's called Embrace The Shake. I have forwarded it so many times and to so many people, you would think I was getting some sort of profit share from Phil Hansen, the speaker. Ted Talks are not flashy. They consist of a lone speaker on a plain stage. There really isn't much to a Ted Talk, just someone with an incredible story to share. Ted stands for technology, entertainment, and design and the talks are filled with interesting and important messages. 

What began as one conference has expanded immensely with TedX talks and Ted Ed clubs. Everyone seems to connect with these talks because the ideas and stories that are shared are so fantastic and the speakers are polished and interesting. Teachers have really embraced Ted Talks in the classroom because they often convey a message or an understanding that we hope our students are able to take away and connect with as they continue to learn in our classes. But then what? So you watch the video and then have a discussion? Maybe answer a few questions? 

Ted has created an answer to this issue with the Ted Ed lesson platform. 

The platform, which can be found at ed.ted.com/educator, allows you to give your students one video and then embed questions, provide additional information, and have an online discussion. 

Here's how it works:
Go to the site and either click Discover Lessons that have already been created, or create a lesson by clicking Try It Out.


When you create a lesson, you will be prompted to either search for a video or enter the url for a youtube video. When you find a video that fits with your lesson, click continue and you can add your questions. The questions are categorized as: Let's Begin, Think, Dig Deeper, Discuss, And Finally. 

Let's Begin: 

This is where you can enter information about the lesson. Set the tone for where you want your students to be while engaging with this topic. 

Think:

Here, you can enter multiple choice and/or open ended questions.

Dig Deeper:

Want to give your students additional resources or information at this point? Enter it here.

Discuss:

Enter discussion questions here.

And Finally:

Have some closing thoughts to wrap up the lesson? This is the place to put them. 

After you create your lesson, you are given a link so you can easily share it with students so they can access it. You have the option of allowing them to join as a guest or having them make an account. 


The Teacher Dashboard:

When you log in, you are able to see all of your lessons. Click on a lesson, and you can see your students' work. Right on the dashboard, you can see how many students have logged in and the number of discussions completed. 

When I click to review student work, I can see all of the students who completed the lesson. I can click to view their responses and offer feedback. The discussion responses show up in a thread. Students can chime in and offer responses to other students' comments in the discussion section. 
As a teacher, I can review work by student and I can download all of their work to a csv file.

Like most systems, TedEd will send you notifications if you want them. You can receive an email to let you know that a student responds to a question or to your feedback. You can also receive notifications on discussion threads. 

I have been using the TedEd platform with my students and, while they needed some explanation at first, they are engaged with the videos and we are able to have a much richer conversation when they come to class

Have you been using the TedEd platform? How else do you utilize Ted Talks in the classroom?
Feel free to post in the comments below. 

Monday, December 3, 2018

FTT - Virtual Reality in the Classroom

Get your VR goggles ready!

@LisaBerghoff/@MrKimDHS


Image result for virtual reality

OK so I'll admit, I lost a few years of my life in college to a massive online multiplayer video game called World of Warcraft. I used to be rather proud of my ability to get 6-10 glorious hours of gaming in without needing food or drink or respite (my record was 13 hours, don't tell my parents). While I spent many a night, alone and attached to my computer, I was actually being quite social. I interacted with my guild mates through the game-play, and communicated with dozens of people through my headset. I actually got to "know" some of these guys closely, and became "friends."


Now in hindsight, I would probably tell college me to STAY AWAY from it all, but I am still amazed at the complexities and allure of virtual reality. Because at a basic level, that's what video gaming is: direct interactions with a virtual world. So the hierarchy of VR goes something like this:

  • Non-Immersive - computer screens and video games
  • Augmented Reality (AR) - graphics on top of the real world
  • Immersive System - VR Goggles and simulators
Believe it or not educational researchers have considered VR to be just another natural evolution of computer-assisted instruction and training, and have been studying its benefits since the early 60's (Pantelidis). The US Military is one of the first institutions to utilize VR through its immersive flight simulators to train their fighter pilots. So how do we use it in our classrooms?

Explore

Bring your students on a virtual field trip to places that would be otherwise inaccessible. Thinglink, Roundme, YouTube VR, and Google Expeditions are some excellent resources filled with virtual tours and destinations for your students. Many of the world's most prized museums like The Louvre and the Metropolitan Museum of Art have created interactive virtual tours. Thousands of historic landmarks, cities, and even historical events have been recreated virtually. 

Simulate Experiences

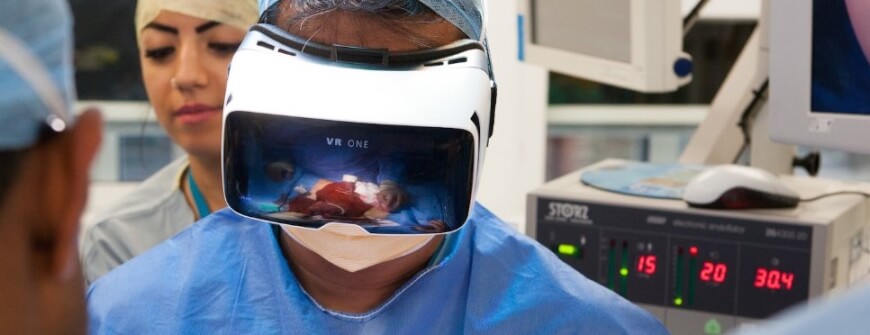
Like the fighter pilots and their flight simulators, teachers could use VR to give students "hands on" experiences with real life processes. Labster is a firm that has developed virtual lab experiences for chemistry, biology, ecology and more. While a bit down the line, medical schools and hospitals have begun utilizing VR for training, surgery, and patient therapy.


5 Ways Medical Virtual Reality Is Already Changing Healthcare

Access

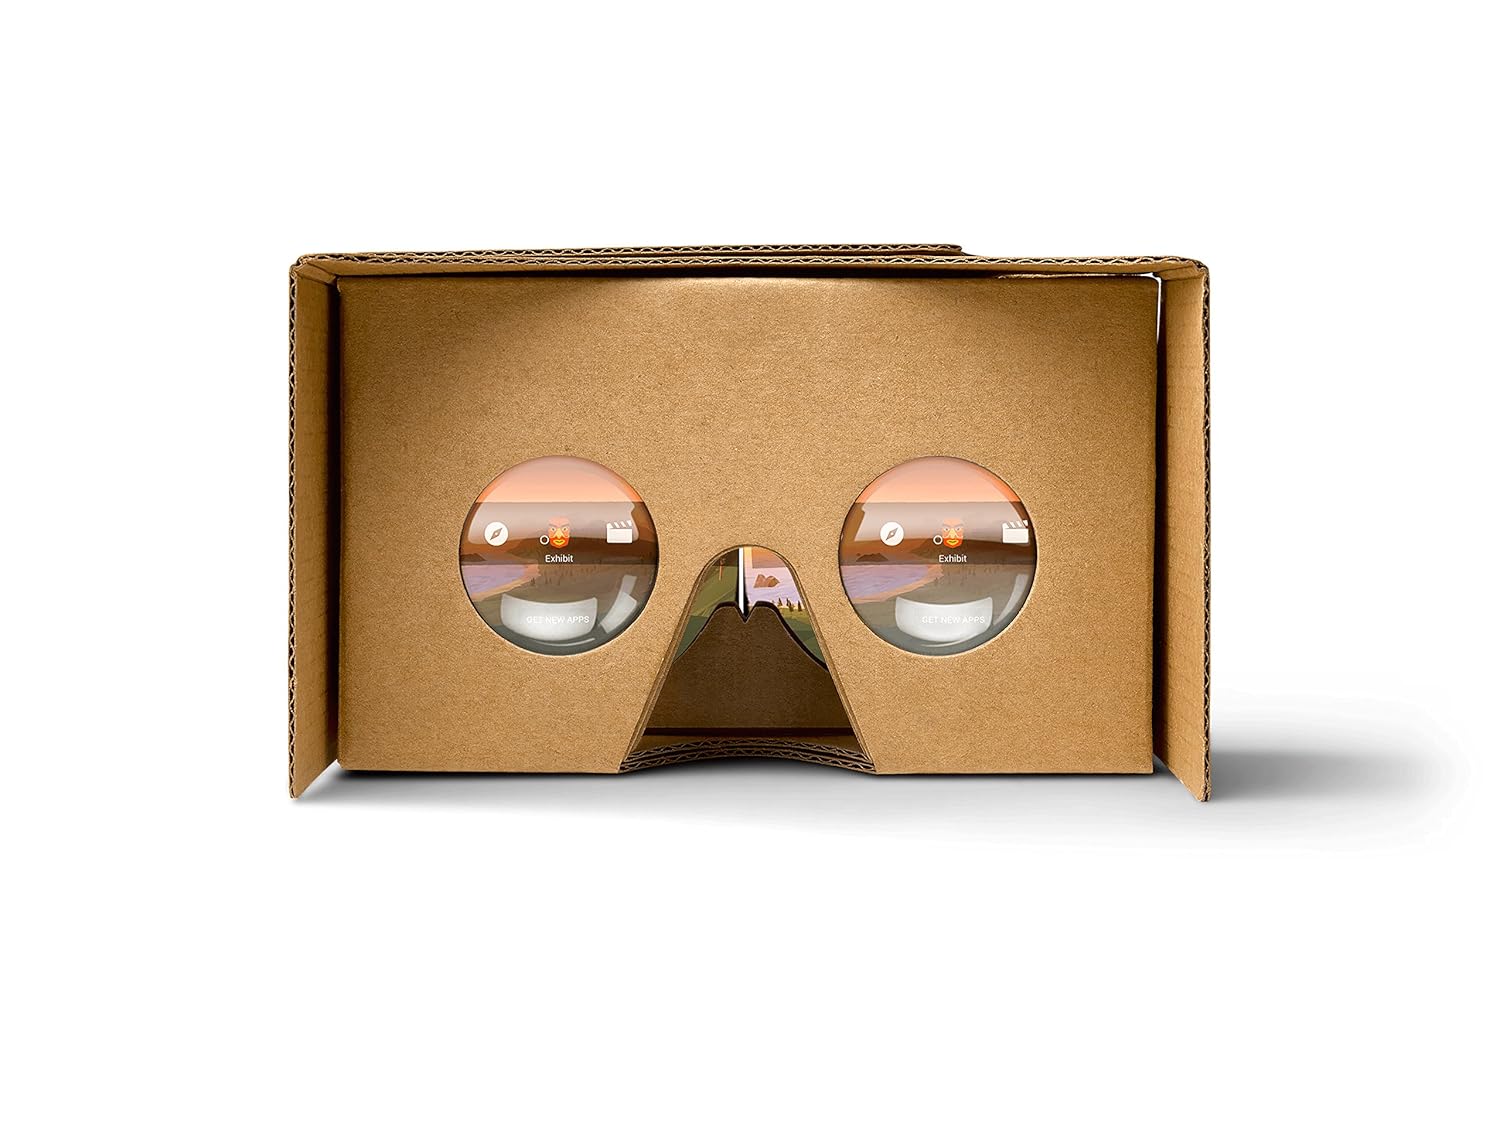
Most educators (85%) believe that VR technology could benefit their students, but only 2% of teachers are actually using it in their classrooms. A whopping 28% of educators polled believe that VR technologies will never catch on in their school or district. I think a lot of educators are worried about access to the technologies and programs available. Fortunately, Google et al have really paved the way for educators by developing enough free programs and curriculum in educational VR. Their relatively cheap ($15) Google Cardboard relies upon the power of our own cell phones to bring our classrooms into the virtual world. 


Interested in using VR in your classroom? Need some support? Comment below!

Tuesday, November 27, 2018

FTT - Closed Captioning for Google Slides

Presenting? 


Make It Accessible With Closed Captioning For Google Slides.


I am always thinking about access for our students. One of the main ideas behind Universal Design for Learning is removing barriers for students to maximize learning. Those barriers can come in many forms and some are easier to spot than others. For example, finding what motivates a student to keep at a task even when faced with negative results can be extremely challenging. Students who struggle with reading because of a learning disability or a language barrier can also be tricky because our system of learning is language based. I'm excited about today's free tech tool because this simple tool can help many students in different ways. 

Many of our teachers use a lecture format of teaching. They project a presentation on the board and they talk. This can be problematic for students who have hearing impairments,struggle to understand oral language,  struggle to pay attention, or just to keep up. 

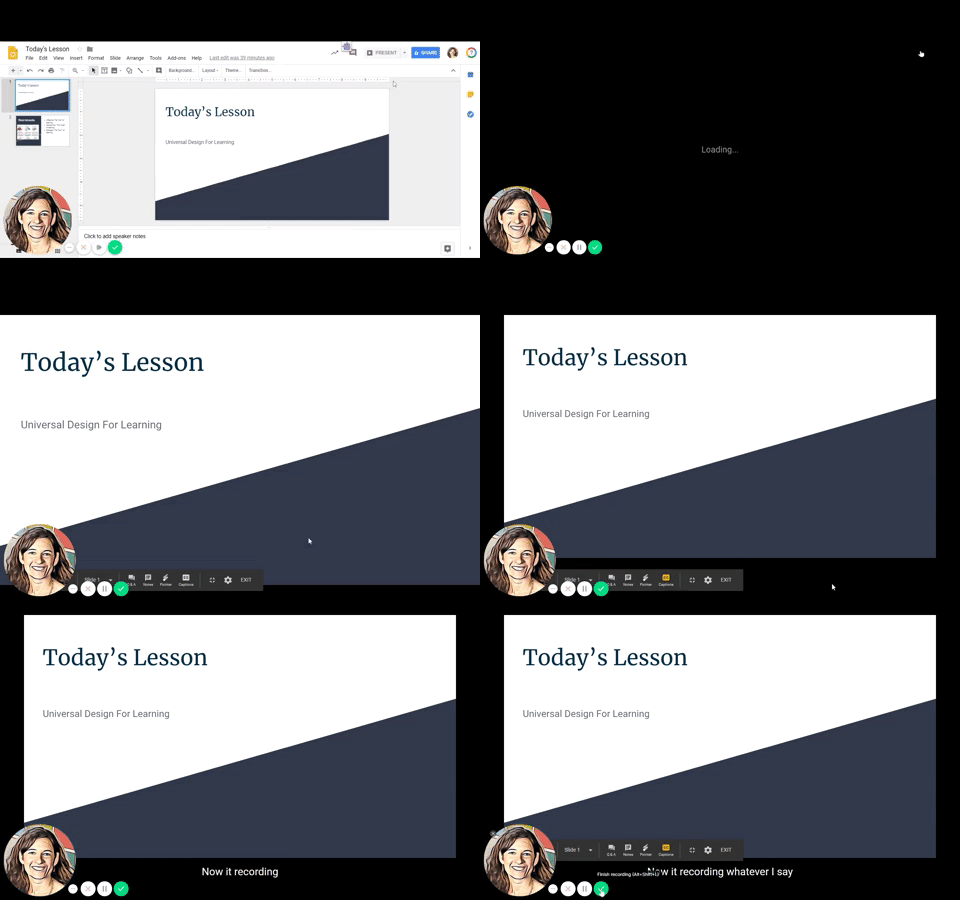
In an ongoing effort to make Google products more accessible to greater numbers of users, there is now a feature in the present mode of Google slides that will generate closed captioning while you are speaking. 

Here's how it works:
1. Open a google slides presentation
2. Click Present in the upper right corner
3. The present tools will open at the bottom of your screen, click Captions

A bar will open on your screen and will begin typing what you say!


But wait, you can take it one step further...
Give your presentation with the closed captioning on and screencast it using Loom. Now you have a video recording of your presentation with closed captioning built in!

This could be valuable for our students who benefit from multiple input modalities. They can see your images, hear you talking, and see the text on the screen all at once. Use of this tool can potentially remove barriers for many of our students.

Here is a 90 second video showing you how this works:


Monday, November 19, 2018

FTT - Final Exams/Paper/Projects and Schoology


Two things are coming (besides Winter): final exams and my first child. In anticipation of my wife and I basically becoming shut-ins with no professional communications to the outside world, we better cover some end-of-the-semester Schoology tips before the last push!


Make sure your final exam/project/paper exists in your gradebook

So the first thing to do is to find out if you've created a final exam grading period. If your final exam exists outside of your running "semester grade," you'll have to create a grading period. So for example, my semester grade is made up of "class work" and "papers and projects." These two categories make up 80% of the final grade, while my final makes up the remaining 20%. If none of that makes sense, take a look at the breakdown below:


To do this:

  • Click on the “Gradebook” tab and create an assignment that’ll be designated as your final.
  • Change the grading period to “Final/Midterm Material Grades”
  • Click on the Plus Sign at the top right, and click on “Add Grade Column.” 
  • Name your final and set the points.
    • You can initially unpublish your final, input all of your grades, and then publish 
  • Then click on the "Gradebook Setup" tab to change the percentage weights.
  • You can change the S1-DHS/HPHS from 100 to accommodate for the final

Final Grade Scales

Schoology's scale system isn't immediately intuitive so we'll have to make a distinction between assignment scales, and final grade scales. In the gradebook setup page, scales show up twice. The scale choice on the top right is for individual assignments. The scale choices under "Final Grade Settings" will be where you decide to round final grades or choose a pass/fail scale. 


The distinction between "THSD 113 Rounded .5" and Schoology's "Round Period/Final Grades" is important:
  • THSD 113 Rounded .5 will round scores up to the nearest percentage. So an 89.6 will stay an 89.6, but it will count as an A-.
  • Round Period Grades will turn an 89.6 into a 90.0.
  • Teachers will also have the option to assign final grade values into Infinite Campus at the end of the grading period. 
Also important: Do not use the gradebook scale, "Numeric" as it will cause issues when the grades sync over to Infinite Campus. Failing grades will be relabeled from an "F" to the much scarier "H."

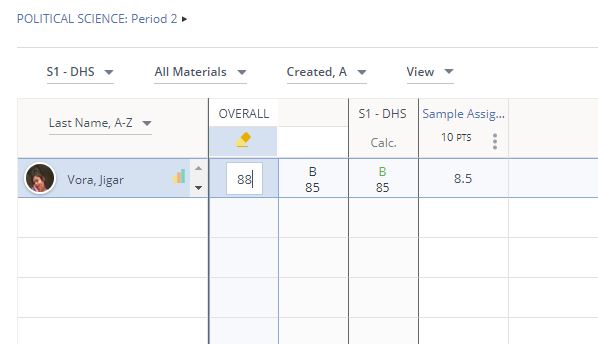
Course Override Column

Enabling the course override column gives you the ability to manually override all student scores. It will you give unilateral control over what percentage your students receives in your course, regardless of the calculated score. This can be useful for manually curving final scores. 


Have any other end-of-the-semester questions or concerns? Comment below!